Golden Oreo Cheesecake: A Creamy, Dreamy No-Bake Dessert You’ll Make on Repeat
Introduction
There are desserts you make once for a party and forget about. Then there are desserts that follow you home. This Golden Oreo Cheesecake is firmly in the second category.
I first made this on a rainy Sunday afternoon when I had a half-finished pack of Golden Oreos sitting on the counter and a block of cream cheese that needed using. What came together in that kitchen was something I did not expect — a thick, velvety cheesecake with a buttery, vanilla-scented crust that snaps cleanly against the fork and a filling so smooth it practically melts before it even reaches your tongue.
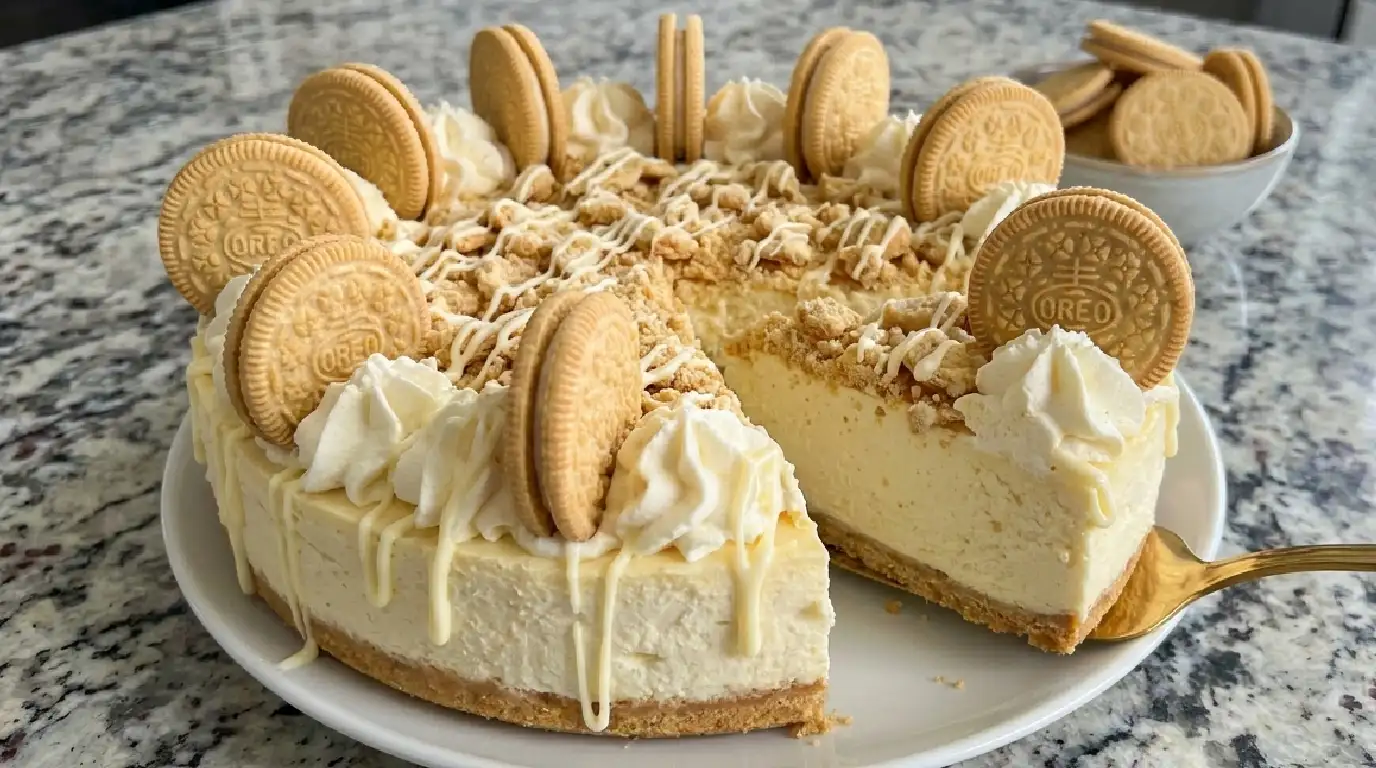
Golden Oreos are not just a crust ingredient here. They are the soul of the whole thing. Their honeyed sweetness and soft, slightly caramelized flavor seep into every layer, from the crumbly base to the cream cheese filling. If you have been looking for a no-bake cheesecake that actually tastes like it came from a bakery, with that dense, creamy center and perfectly firm slice, this is it.
No water bath. No springform anxiety. Just a recipe that comes together with a few simple steps and rewards you with something genuinely impressive.
Why You’ll Love This
- No oven required, which means you can make this in the middle of summer without breaking a sweat and still walk out with a showstopper dessert.
- The Golden Oreo crust is butterscotch-golden, slightly crisp, and holds its shape beautifully when sliced — no crumbling, no collapsing.
- The filling is thick and rich but not heavy. It sets firmly in the fridge while staying silky and smooth on the palate.
- It is a make-ahead dream. You can bake — well, chill — this the night before and pull it out looking like you spent all day on it.
- Crowd-pleasing in the most honest sense. Even people who claim they are not dessert people come back for a second slice.
The Backstory
My sister-in-law Priya has famously strong opinions about food. She does not like cheesecake, she says. Too rich, too dense, not her thing. I have heard this at every family gathering for years. The first time I brought this Golden Oreo Cheesecake to dinner, I did not even mention what it was — I just set it on the table and walked away.
Twenty minutes later, she was asking me for the recipe. Not because she was being polite. Because she had eaten two slices.
That is the thing about this recipe. It does not announce itself aggressively. The flavor is warm and familiar — that vanilla-golden cookie note, the tangy cream cheese, the lightly sweet whipped filling — it all lands softly. There is nothing sharp or overwhelming about it. It just tastes like something you have been craving without knowing it.
Since that dinner, I have made this for birthday parties, potlucks, and late-night dessert cravings with nothing but a Netflix queue and a craving for something cold and creamy. It has never failed me.
What Makes It Special
- Golden Oreos — Not the classic chocolate variety. The golden, vanilla-flavored cookies bring a toasted, caramel-forward sweetness that is completely different from a standard Oreo crust. That buttery cookie flavor carries through every single bite.
- Full-fat cream cheese — This is not the place for reduced-fat anything. Full-fat cream cheese gives you that dense, silky texture and the slight tanginess that makes cheesecake taste like cheesecake.
- Heavy whipping cream — Whipped to stiff peaks and folded into the cream cheese base, it lightens the filling just enough to give it an airy, cloud-like quality while keeping it rich.
- Powdered sugar — Dissolves cleanly into the filling with no graininess, keeping the texture ultra-smooth.
- Vanilla extract — A generous pour deepens the flavor and rounds out the sweetness of the golden cookies beautifully.
- Unsalted butter — Melted and mixed into the crushed cookies, it binds the crust and adds a clean, rich backdrop to the whole dessert.
Making It Happen
Start with the crust, because it needs time in the freezer to set up properly before you add the filling.
Crush your Golden Oreos — filling and all — into fine crumbs. A food processor does this quickly, but a zip-lock bag and a rolling pin works just as well if you want to take out a little stress along the way. Once you have a sandy, even crumb, stir in the melted butter until the mixture holds together when you press it between your fingers. It should feel like damp sand — not wet, not dry.
Press this mixture firmly into the bottom and up the sides of a 9-inch springform pan. Use the flat bottom of a measuring cup to really pack it tight. The more compact and even the crust, the cleaner your slices will be later. Slide the pan into the freezer while you work on the filling.
For the filling, beat the softened cream cheese on medium speed until it is completely smooth — no lumps, no streaks. This step is worth doing properly. Cold cream cheese fights back and creates lumps that no amount of mixing will fix later, so give it time to come to room temperature first. Add the powdered sugar and vanilla extract and beat again until everything is silky.
In a separate cold bowl, whip the heavy cream to stiff peaks. You want it firm enough that it holds its shape when you lift the beater but not so stiff that it starts to look grainy. Fold the whipped cream into the cream cheese mixture in two additions, using a gentle hand. You want to keep that light, airy structure intact.
Pull your crust from the freezer and pour the filling in. Use an offset spatula to smooth the top into an even, level surface. Wrap it loosely and refrigerate for at least six hours, or overnight if you can wait that long. The longer it chills, the cleaner and firmer the slices will be.
When you are ready to serve, run a thin knife or offset spatula around the inside edge of the springform before releasing the sides. This prevents any sticking and keeps the crust beautifully intact.
You Must Know
- Room temperature cream cheese is non-negotiable. Cold cream cheese will not beat smooth. Leave it out for at least an hour before you start, or you will spend the rest of the process fighting lumps.
- Chill overnight if you can. Six hours is the minimum, but overnight creates a noticeably firmer, cleaner slice. It is worth the patience.
- Do not skip the freezer step for the crust. A ten-minute freeze before adding the filling helps the butter set so the crust does not crumble when you pour in the filling.
- Fold, do not stir, the whipped cream. Stirring collapses the air bubbles you just worked to create. Use a large spatula and fold in slow, sweeping motions.
- Golden Oreos with the filling included make a better crust. Do not scrape it out. That creamy center adds flavor and helps bind the crumbs.
Serving Ideas & Pairings
This cheesecake stands well on its own, but a few finishing touches and thoughtful pairings make it even better.
For toppings, a handful of crushed Golden Oreos scattered across the top adds texture and visual contrast. A drizzle of salted caramel sauce sinks into the filling beautifully. Fresh berries — particularly sliced strawberries or raspberries — cut through the richness with a bright, fruity note that works remarkably well.
On the beverage side, a cup of hot black coffee or a cold brew is the natural partner here. The slight bitterness of coffee plays against the sweet, creamy filling in a way that keeps the whole experience balanced. For something a little more festive, a glass of cold sparkling rosé or a lightly sweet Riesling complements the vanilla-golden notes without overwhelming them.
If you are serving this at a party, consider slicing and plating it in advance, then returning it to the fridge covered. It holds beautifully and makes serving a crowd much less stressful.
Make It Different
For a chocolate twist, swap half the Golden Oreos in the crust for chocolate sandwich cookies. The contrast between the golden vanilla filling and the darker crust is striking and delicious.
For a fruit-forward version, fold two tablespoons of strawberry or raspberry jam into the cream cheese base before adding the whipped cream. It adds a swirl of fruity brightness that ties in beautifully with fresh berries on top.
For a lemon cheesecake, add two teaspoons of fresh lemon zest and one tablespoon of fresh lemon juice to the filling. The citrus cuts through the richness and gives the whole dessert a fresh, summery edge.
For a dairy-free version, use full-fat coconut cream (refrigerated overnight and separated) in place of heavy whipping cream, and a good-quality dairy-free cream cheese. The texture will be slightly softer but the flavor is still excellent.
For individual servings, press the crust into the bottoms of muffin tins lined with paper cups, then fill and chill. Mini cheesecakes portion beautifully and are great for parties where guests prefer a self-contained dessert.
Storage & Reheating
Cheesecake is a fridge dessert through and through. Store it covered tightly with plastic wrap or in an airtight container in the refrigerator for up to five days. The flavor actually deepens a little on day two and three, so do not worry about making this ahead.
For longer storage, this cheesecake freezes surprisingly well. Slice it first, then lay the slices on a parchment-lined tray and freeze until solid. Once frozen, transfer the slices to a zip-lock bag or airtight container. They will keep in the freezer for up to two months. Thaw individual slices in the refrigerator overnight, or at room temperature for about 30 to 40 minutes.
There is no reheating involved — this is meant to be served cold. A partially frozen slice, if you can wait, has a wonderfully dense, almost ice-cream-cake texture that is its own special experience.
Success Tips
The real difference between a good cheesecake and a great one often comes down to a few small, quiet details that experienced bakers have learned the hard way.
Press the crust with real intention. Spend two to three minutes packing it flat and firm. A well-compressed crust does not crumble or shift, and the difference shows in every single slice.
When folding in the whipped cream, think of it as a collaboration rather than a mix. You are introducing two different textures to each other — gently. Rush it and you lose the lightness. Be patient and the filling will be noticeably airer.
If your cheesecake cracks slightly on top after chilling, do not panic. A handful of crushed cookies or a layer of toppings covers any surface imperfections completely. Presentation is easy to fix; flavor is what matters, and this recipe has more than enough of it.
Finally, use a sharp knife dipped in hot water for slicing. Wipe the blade clean between cuts. It sounds fussy, but it takes ten seconds and the result is clean, bakery-worthy slices every time.
Frequently Asked Questions (FAQ)
1. Can I use regular Oreos instead of Golden Oreos?
Yes, you can, but the flavor profile will shift significantly. Regular chocolate Oreos will give you a darker, more cocoa-forward crust. It is delicious, but it is a different dessert. For the honeyed, vanilla-forward experience this recipe is built around, Golden Oreos are the right choice.
2. What if my filling is too soft and will not hold its shape?
This usually comes down to one of two things: the whipped cream was not whipped to stiff peaks, or the cheesecake did not chill long enough. If the filling seems loose after mixing, pop the whole assembled cheesecake in the freezer for 30 minutes before transferring to the fridge for the remainder of the chill time. That often does the trick.
3. Can I make this without a springform pan?
You can use a deep-dish pie pan or a square baking dish. You will not get the same clean, dramatic slices, but the taste is identical. Line the pan with parchment paper for easier removal if you want to lift slices out cleanly.
4. How far in advance can I make this cheesecake?
This cheesecake can be made up to three days in advance and stored in the refrigerator. Cover it tightly after the first few hours once it has fully set. It holds up beautifully and the flavor is arguably at its best on day two.
5. Do I have to use full-fat cream cheese, or will low-fat work?
Low-fat cream cheese contains more water, which means your filling may not set as firmly and the texture will be noticeably softer and less rich. For a no-bake cheesecake that relies entirely on chilling to hold its structure, full-fat cream cheese is strongly recommended. Save the low-fat version for something else.
Recipe Card
Golden Oreo Cheesecake
Prep Time: 25 minutes Cook Time: 0 minutes (no-bake) Chill Time: 6 hours minimum (overnight preferred) Total Time: 6 hours 25 minutes Servings: 10 to 12 slices Category: Dessert / Cheesecake Difficulty: Easy Cuisine: American Yield: One 9-inch cheesecake
Equipment
- 9-inch springform pan
- Food processor or zip-lock bag and rolling pin
- Stand mixer or hand mixer
- Large mixing bowls (at least 2)
- Rubber spatula or large silicone spatula
- Offset spatula
- Measuring cups and spoons
Ingredients
For the Crust:
- 36 Golden Oreo cookies (one standard package, filling included)
- 6 tablespoons unsalted butter, melted
- Pinch of fine sea salt
For the Filling:
- 24 oz (680g) full-fat cream cheese, softened to room temperature
- 1 cup (120g) powdered sugar, sifted
- 2 teaspoons pure vanilla extract
- 1 1/2 cups (360ml) heavy whipping cream, cold
- 2 tablespoons sour cream (optional, adds a subtle tang)
For Topping (Optional):
- 6 to 8 Golden Oreo cookies, roughly crushed
- Salted caramel sauce, for drizzling
- Fresh berries, for garnish
Directions
Step 1 — Make the Crust: Crush all 36 Golden Oreos (filling included) into fine crumbs using a food processor or by sealing them in a zip-lock bag and crushing with a rolling pin. Transfer to a bowl, add the melted butter and pinch of salt, and mix until the crumbs are evenly moistened and hold together when pressed. Press the mixture firmly and evenly into the bottom and up the sides of a 9-inch springform pan using the bottom of a flat measuring cup. Freeze for 10 to 15 minutes while preparing the filling.
Step 2 — Beat the Cream Cheese: In a large bowl, beat the softened cream cheese on medium speed for 2 to 3 minutes until completely smooth and lump-free. Add the sifted powdered sugar and vanilla extract (and sour cream if using). Beat again on medium-high for another 2 minutes until silky and well combined. Scrape down the sides of the bowl as needed.
Step 3 — Whip the Cream: In a separate chilled bowl, whip the cold heavy cream on medium-high speed until stiff peaks form, about 3 to 4 minutes. The cream should hold its shape firmly when the beater is lifted.
Step 4 — Combine Filling: Add the whipped cream to the cream cheese mixture in two additions, folding gently with a large spatula using slow, sweeping motions. Do not stir. Fold until just combined and no white streaks remain.
Step 5 — Fill and Chill: Remove the crust from the freezer. Pour in the filling and smooth the top with an offset spatula. Cover loosely with plastic wrap and refrigerate for at least 6 hours, preferably overnight, until fully set and firm.
Step 6 — Serve: When ready to serve, run a thin knife around the inner edge of the springform pan before releasing the sides. Top with crushed Golden Oreos, a drizzle of caramel sauce, or fresh berries if desired. Slice with a sharp knife dipped in hot water, wiping between cuts for clean slices.
Notes
- Room temperature cream cheese is essential for a smooth, lump-free filling. Do not skip this step.
- This cheesecake can be made up to 3 days in advance and stored covered in the refrigerator.
- To freeze: slice, freeze on a parchment-lined tray, then transfer to an airtight container. Thaw overnight in the fridge.
- For a lemon variation, add 2 teaspoons of lemon zest and 1 tablespoon of fresh lemon juice to the filling.
- Golden Oreos (not chocolate) are strongly recommended for the intended flavor of this recipe.
Nutrition (Per Slice, Based on 12 Servings)
| Nutrient | Amount |
|---|---|
| Calories | 485 kcal |
| Total Fat | 34g |
| Saturated Fat | 19g |
| Cholesterol | 95mg |
| Sodium | 310mg |
| Total Carbohydrates | 42g |
| Dietary Fiber | 0.5g |
| Sugars | 30g |
| Protein | 5g |
Nutrition values are estimates based on standard ingredient brands and may vary depending on specific products used.