
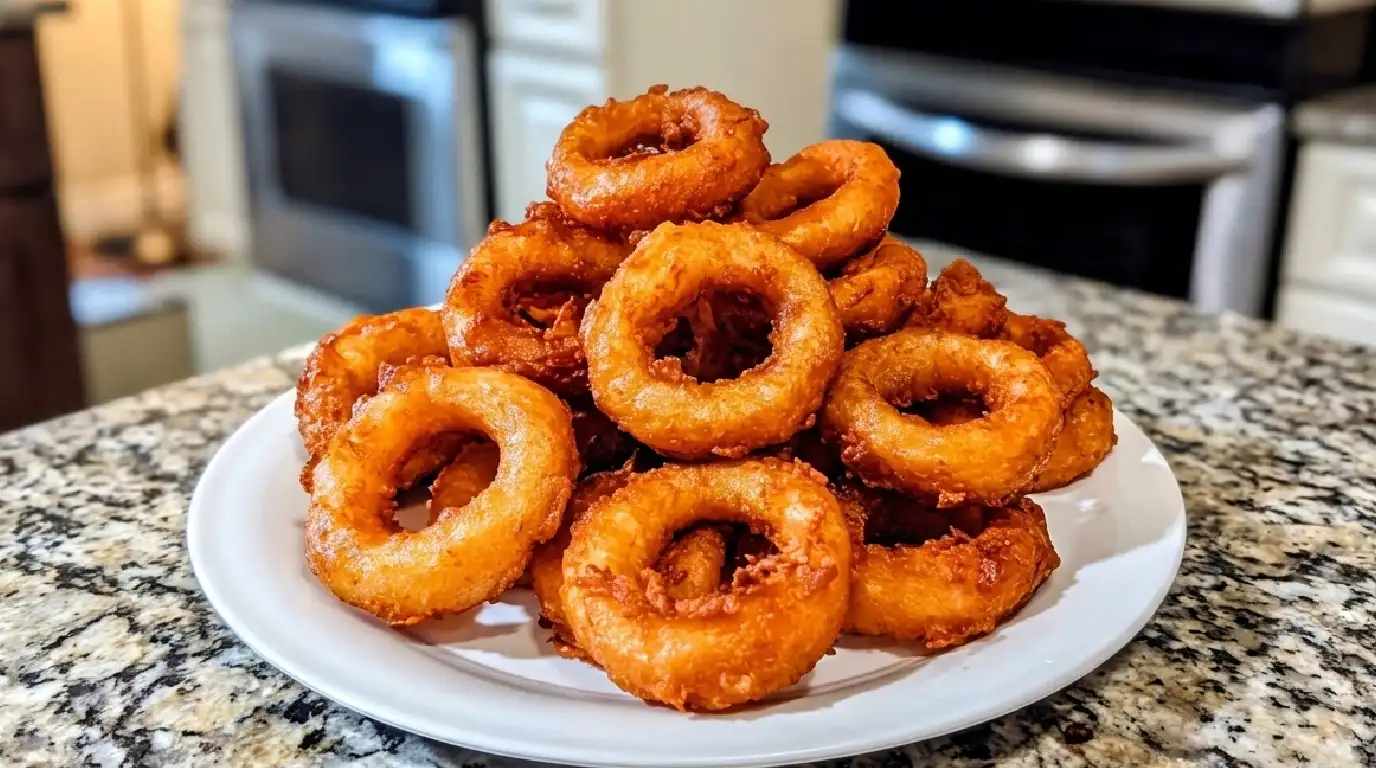
Homemade Onion Rings That Actually Stay Crispy: The Recipe Your Kitchen Needs
Introduction
There’s a specific moment when homemade onion rings hit their peak: when the golden-brown exterior shatters between your teeth, releasing the sweet, tender onion beneath. That crackling sound isn’t just texture—it’s the difference between what a restaurant fries and what most home cooks accidentally create. This homemade onion rings recipe delivers that coveted contrast every single time, with a buttermilk-seasoned batter that clings to each ring and a frying technique that locks in the crunch without leaving your kitchen smelling like a deep fryer for a week.
I developed this approach after too many batches that turned soggy after five minutes or came out pale and limp. The secret isn’t complicated—it’s about temperature control, the right batter consistency, and a single technique that makes all the difference. This recipe works whether you’re feeding a crowd at a backyard cookout or satisfying a sudden craving at dinnertime.
Why You’ll Love This
What makes this homemade onion rings recipe stand out deserves highlighting:
- The batter stays crispy for hours, not minutes, thanks to a touch of cornstarch and vodka that evaporates quickly
- Sweet yellow onions turn tender and almost buttery inside their crunchy shell, creating a completely different experience than store-bought versions
- The buttermilk base adds subtle tangy depth that takes the batter beyond basic salt-and-pepper territory
- You control every ingredient, so you can adjust seasoning and heat levels to your exact preference
- The recipe works equally well for casual weeknight sides or impressive appetizers that guests actually remember
The Backstory
My sister’s family visits once a year, and her husband has always been skeptical about homemade versions of fried foods. He’s not a snob—he just believed restaurants had equipment and techniques home cooks simply couldn’t replicate. During his last visit, I made this onion rings recipe without announcing what I was doing, just set a platter on the table with some spiced mayo as a dipping sauce.
He ate six without looking away from the television. Then he asked for the recipe.
The next time they visited, he brought the printed version with handwritten notes in the margins. He’d made them three times and was still fine-tuning his technique. What shifted his perspective was realizing that homemade doesn’t mean inferior—it just means different. Restaurant onion rings are designed for speed and consistency across hundreds of servings. These are designed for actual flavor and texture, and they’re worth the fifteen minutes of active work.
What Makes It Special
Several specific ingredients and techniques make this homemade onion rings recipe distinctive:
- Sweet yellow onions provide natural sugars that caramelize slightly during frying, creating sweetness that competes with the savory batter
- Buttermilk tenderizes and seasons the batter simultaneously, adding tang that brightens the richness of the oil
- Cornstarch mixed with flour creates a crisper exterior than flour alone, and it stays crunchier as the rings cool
- Vodka in the batter evaporates during frying, creating tiny air pockets that contribute to that shattering texture
- Paprika, cayenne, and garlic powder season the batter layer itself, so flavor lives in the coating rather than requiring sauce for taste
- Double-coating—dipping in batter, letting it drip, then dipping again—builds a thicker, sturdier shell that resists oil absorption
Making It Happen
Preparing homemade onion rings involves more finesse than randomly coating and frying. Start by slicing your onions into rings about half an inch thick. Take time here—rings that are too thin will fall apart inside the batter, while thick slices leave raw centers. Soak the rings in ice water for at least thirty minutes. This hydrates the onion while keeping the structure intact, which prevents them from shrinking dramatically during cooking. Some water will separate and freeze slightly, which is exactly what you want.
While the onions chill, prepare your batter. Whisk together flour, cornstarch, paprika, cayenne, garlic powder, and salt in one bowl. In another, combine buttermilk and vodka, then add an egg yolk. Mix the wet ingredients into the dry until you have a smooth batter about the consistency of thick pancake batter—not so thin that it runs off, not so thick that it clumps.
Pour oil into a heavy pot or Dutch oven until it reaches three inches deep. Use a kitchen thermometer and bring the oil to 350°F (175°C). Maintaining temperature is absolutely critical. If oil is too cool, the batter absorbs oil and turns greasy. If it’s too hot, the outside browns before the inside softens, creating a texture disconnect.
Drain your onion rings on paper towels, separating them gently so they don’t stick together. Working in batches to avoid crowding the oil, dip each ring into the batter, allow excess to drip for just a second, then carefully place it in the hot oil. Fry for about ninety seconds on the first side, until deep golden brown. Flip carefully and fry for another minute on the second side. The entire process should take about two to three minutes per batch.
Transfer fried rings to a wire rack or paper towels. This is important—never stack them while hot, as steam between rings causes them to soften. Let them rest for just a minute before the texture reaches peak crispiness. That brief window when they’re still warm but the batter has set is when they achieve their perfect state.
You Must Know
Success with this homemade onion rings recipe depends on several non-negotiable details:
- Use a reliable thermometer for oil temperature; eyeballing it will result in inconsistency, even if you’re experienced with frying
- Never skip the buttermilk soak for your onions—this creates a firm outer layer that prevents them from collapsing in the center
- The vodka isn’t optional if you want lasting crispiness; it literally evaporates faster than water, leaving a drier batter behind
- Fry in batches small enough that oil temperature doesn’t drop significantly; adding too many cold rings at once will plummet your oil temp and ruin the texture
- Resist the urge to poke or flip the rings before they’ve set; let them sit undisturbed for that first ninety seconds so the exterior can crisp
Serving Ideas & Pairings
Onion rings work as sides, appetizers, or honestly, as a meal on their own when you add protein. Pair them with crispy fried chicken for a textural dream, or alongside a thin burger where they complement rather than compete. Spiced mayo, sriracha-honey, or chipotle ranch all elevate the rings without masking their sweet onion center.
For beverages, cold beer is the obvious choice—something crisp and lager-forward. If you prefer non-alcoholic options, try iced lemonade or a ginger ale with fresh lime. These cut through the richness and refresh your palate between bites. For a sit-down meal, dry white wine like Sauvignon Blanc works better than you’d expect, as the acidity mirrors the tang of the buttermilk base.
Make It Different
The base recipe is forgiving enough to accommodate variations without losing integrity. If you prefer more heat, increase cayenne to a full teaspoon and add a quarter teaspoon of black pepper. For a chili-forward flavor, swap the paprika for smoked paprika and add a pinch of ground cumin. Some people love a coating with just a whisper of Old Bay seasoning, which works beautifully with sweet onions.
For dietary adjustments, you can substitute vodka with equal parts water and vinegar if you don’t cook with alcohol. The crispiness won’t be quite as pronounced, but it’s still solid. Olive oil can replace a portion of your neutral oil if you enjoy a more assertive flavor, though don’t use it exclusively as it has a lower smoke point and can develop acrid notes.
If you don’t eat dairy, try a combination of unsweetened almond milk and a tablespoon of lemon juice instead of buttermilk. This approximates the tanginess. For a completely different direction, try white onions instead of yellow for a sharper, more pronounced onion flavor, or Vidalia onions for even more sweetness and a softer texture in the center.
Storage & Reheating
The difficult truth about fried foods is that they’re best consumed within minutes of cooking. That said, leftover onion rings will keep in an airtight container in the refrigerator for up to three days. They’ll soften gradually, but they won’t develop off-flavors or spoil.
To reheat, forget the microwave—it will steam them into limp submissions. Instead, preheat your oven to 375°F (190°C), spread the rings on a baking sheet, and warm for eight to twelve minutes until they regain crispiness. Some texture is lost compared to fresh, which is inevitable with any fried food, but this method minimizes the damage. A quick brush with a light neutral oil before reheating helps restore surface crunch.
For longer storage, onion rings actually freeze reasonably well. Flash freeze them on a sheet pan for a few hours until solid, then transfer to a freezer bag. They’ll keep for two months. Reheat frozen rings directly in a 400°F (200°C) oven for fifteen to eighteen minutes without thawing.
Success Tips
Mastering this homemade onion rings recipe involves subtle techniques that separate good batches from exceptional ones. Temperature recovery matters more than most home cooks realize—after adding the first batch of rings, your oil temperature will drop several degrees. Wait until it climbs back to 350°F before adding the next batch, even if that means waiting five minutes between batches. Rushing this step compounds across multiple batches and results in progressively greasier rings.
The batter’s consistency changes as you work, especially if your kitchen is warm. Every ten minutes or so, check your batter. If it’s become too thick, thin it slightly with a tablespoon of buttermilk. If it’s separating, whisk again. A batter that’s the right consistency should coat the onion ring like a second skin, not drip off or pile up in thick clumps.
Pay attention to onion size consistency. Rings that are dramatically different thicknesses will fry unevenly, no matter your temperature control. Aim for uniformity—if you have three jumbo rings and seven regular rings, the large ones will still be firm in the center while the small ones are approaching burnt.
One final detail: allow your oil to cool completely before disposing of it, and never pour used oil down the drain. Let it solidify in the pan, scrape it into a container, and place it in your regular trash or use a disposal service if available. This protects your plumbing and the municipal water system.
Frequently Asked Questions (FAQ)
Can I use a different oil for frying? Yes, any neutral oil with a smoke point above 350°F works well. Canola, vegetable, and peanut oils are all solid choices. Avoid olive oil for the primary frying oil due to its lower smoke point and strong flavor that will overpower the delicate onion. If you prefer avoiding seed oils, clarified butter or ghee work beautifully, though they’re more expensive and require closer temperature monitoring.
Why do my onion rings fall apart during frying? This usually happens for two reasons: either your onion rings are too thin (cut them thicker), or you’re breaking apart your soaked rings before frying them. Buttermilk softens the onion slightly, so rough handling causes them to shatter. Handle them gently when drying and coating. Additionally, ensure your batter is thick enough to create a protective shell. If your batter is too thin, the onion won’t have support.
What’s the purpose of vodka in the batter? Vodka evaporates faster than water during the high-heat frying process. This means it contributes to the liquid component needed for a smooth batter, but it dries out more quickly than water would, leaving a lighter, crispier crust. The alcohol burns off completely, so there’s no residual flavor or intoxicant content in the finished rings.
Can I prepare the batter ahead of time? Prepare it up to two hours before frying and store it covered at room temperature. Don’t refrigerate batter, as cold batter creates a thicker, heavier crust. If you prepare it further ahead, the leavening action from the batter will diminish, resulting in denser rings. For best results, make it thirty minutes before you plan to fry.
How do I know when my onion rings are properly fried? They should be deep golden brown on both sides—not just light golden, and definitely not pale. The exterior should feel crisp and shatter slightly when you bite it. If the interior onion is too firm or crunchy, you either cooked it too long or your rings were too thick. If it’s mushy, you either didn’t cook it long enough or your oil was too cool. Perfect rings have a pronounced contrast between the crispy, shattered exterior and the soft, tender, slightly sweet onion center.
Recipe Card Info
Prep Time: 40 minutes (including onion soaking) Cook Time: 15 minutes Total Time: 55 minutes Servings: 4 to 6 servings as a side dish Category: Appetizer, Side Dish Difficulty: Moderate Cuisine: American Yield: About 24 to 30 rings Equipment: Heavy pot or Dutch oven, deep-fry thermometer, slotted spoon or spider skimmer, wire rack, paper towels
Ingredients
- 3 large sweet yellow onions
- 1 cup all-purpose flour
- 1/2 cup cornstarch
- 1 teaspoon paprika
- 1/2 teaspoon cayenne pepper
- 1/2 teaspoon garlic powder
- 1 teaspoon salt, plus more for finishing
- 1 cup buttermilk
- 3 tablespoons vodka
- 1 large egg yolk
- Oil for frying (enough for 3 inches of depth in your pot, approximately 6 to 8 cups depending on pot size)
Directions
Step 1: Prepare the Onions Slice onions into half-inch rings, keeping the layers intact as much as possible. Separate the rings gently and submerge them in a bowl of ice water. Let them soak for at least thirty minutes. This hydrates the onion while keeping the structure firm.
Step 2: Make the Batter In a large mixing bowl, whisk together flour, cornstarch, paprika, cayenne pepper, garlic powder, and salt. In a separate bowl, combine buttermilk, vodka, and egg yolk. Whisk until smooth. Pour the wet mixture into the dry mixture and fold together until you have a smooth batter with the consistency of thick pancake batter. Don’t overmix; a few small lumps are fine.
Step 3: Heat the Oil Pour oil into your pot until it reaches three inches deep. Place a thermometer in the oil and bring it to 350°F (175°C). Maintain this temperature throughout frying. Use medium to medium-high heat; adjust the burner as needed to keep the temperature stable.
Step 4: Prepare Rings for Frying Drain the soaked onion rings thoroughly on paper towels, gently separating them. Pat them dry, but don’t press hard or they’ll fall apart.
Step 5: Coat and Fry in Batches Working in small batches to avoid crowding, dip each ring into the batter, allowing excess to drip off for just a second. Carefully place it in the hot oil. Fry for about ninety seconds on the first side until deep golden brown, then flip and fry for another minute on the second side. Total frying time is about two to three minutes per batch.
Step 6: Drain and Cool Transfer fried rings to a wire rack (not directly to paper towels, which can trap steam). Let them rest for one minute until the batter sets and reaches peak crispiness. Season with additional salt while still warm.
Step 7: Repeat Allow oil temperature to return to 350°F before adding the next batch. Repeat steps 5 and 6 until all rings are fried.
Notes
These rings are best enjoyed fresh and warm, straight from the oil. They can be held warm in a 200°F (95°C) oven for up to thirty minutes without significant texture loss. Leftover rings refrigerate for up to three days and can be reheated in a 375°F oven for eight to twelve minutes. For frozen storage, flash freeze on a baking sheet for two hours, then transfer to a freezer bag for up to two months. Reheat frozen rings in a 400°F oven for fifteen to eighteen minutes without thawing. The recipe doubles easily if you’re feeding a larger crowd; just ensure you’re maintaining consistent oil temperature and not overcrowding your pot during frying, as this is the most common reason for uneven or greasy results.
Nutrition
Per serving (6 servings): Approximately 380 calories, 18g fat (2.5g saturated), 48g carbohydrates, 4g protein, 780mg sodium, 15mg cholesterol, 2g fiber
Note: Nutrition information is estimated based on standard values for ingredients used. Actual values may vary depending on specific brands, onion size variation, and oil absorption during frying.
