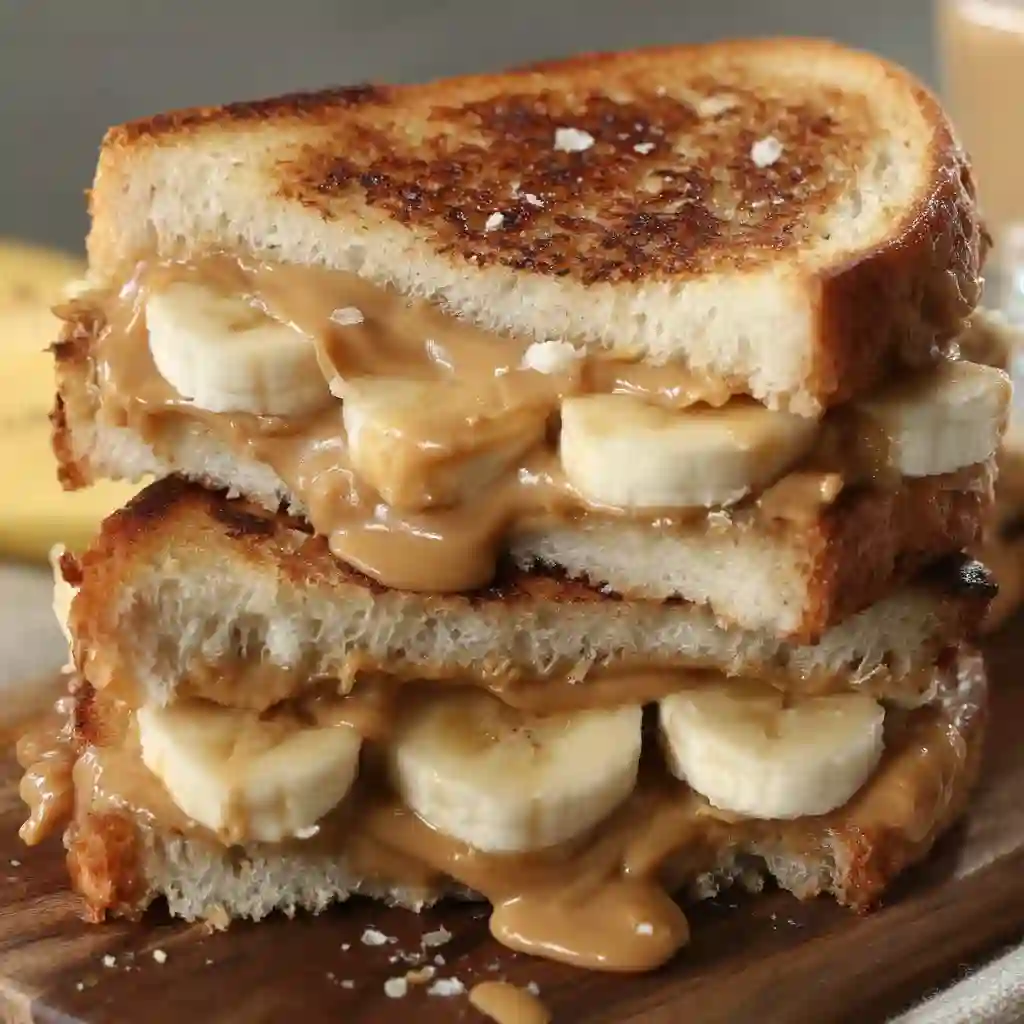
The Ultimate Grilled Peanut Butter Banana Sandwich: Crispy, Gooey Comfort in Every Bite
Remember those rainy afternoons when the world felt grey, and only something warm, sweet, and utterly comforting would do? For me, that magic often came wrapped in the golden, crispy embrace of a grilled cheese. But one day, staring at a lonely banana and a jar of creamy peanut butter, inspiration struck. What if…? The result was a revelation: the Grilled Peanut Butter Banana Sandwich. Imagine this: thick slices of hearty bread, griddled to a perfect, buttery crunch, giving way to a molten river of sweet, salty peanut butter and caramelized, tender banana slices. That first bite – the shatter of the crust, the warm, oozy center, the burst of fruity sweetness – instantly became my edible security blanket. It’s more than a sandwich; it’s pure, unadulterated comfort food alchemy, ready in minutes but lasting in memory. Let’s make that magic happen in your kitchen.
Why You’ll Love This Grilled Peanut Butter Banana Sandwich
Instant Comfort: Warm, gooey, and satisfying – it’s like a hug for your taste buds, melting stress away.
Effortless & Quick: Seriously, 10 minutes from craving to blissful indulgence. Perfect for busy mornings, lazy afternoons, or late-night snack attacks.
Nostalgia with a Twist: Takes the childhood classic PB&B to a whole new level of crispy, caramelized deliciousness.
Endlessly Customizable: Play with different nut butters, breads, add-ins, and toppings to make it uniquely yours.
Surprisingly Satisfying: The combo of protein, healthy fats, and carbs makes it more sustaining than your average sweet treat.
The Picky Eater Convert
My nephew, a notorious carb-and-cheese-only connoisseur, eyed my creation with deep suspicion. “Bananas? Warm? In a sandwich?” One hesitant bite later, his eyes widened. “Whoa… that’s actually… really good!” The crispy exterior won him over first, then the warm, sweet banana melded with the rich peanut butter sealed the deal. He now requests his “Auntie’s Fancy Grilled PB&B” every visit. Proof that this simple combo holds unexpected magic!
What Makes It Special: The Key Players
Creamy Peanut Butter: The rich, salty-sweet heart of the sandwich. It melts beautifully, creating that irresistible oozy texture. Natural peanut butter works, but classic creamy (like Jif or Skippy) often grills smoother.
Perfectly Ripe Bananas: Look for bananas with plenty of brown speckles – they’re sweeter, softer, and caramelize divinely against the hot griddle.
Hearty Bread: Thick-sliced bread (Brioche, Texas Toast, Sourdough, or good Artisan White) is essential. It holds the filling without collapsing and achieves that dreamy golden-brown, crispy crust.
Quality Butter: Generously slathered on the outside of the bread, it’s the secret to that deep, rich flavor and shatteringly crisp exterior. Salted butter adds the perfect counterpoint.
Making It Happen: Your Journey to Gooey Bliss
Prep Your Station: Grab your trusty skillet or griddle (cast iron is king here!) and place it over medium-low heat. You want gentle, even heat to melt the filling and crisp the bread without burning. While it warms, slice your banana into even rounds, about 1/4-inch thick.
Build the Foundation: Lay out your two slices of bread. Spread a generous, even layer of creamy peanut butter on one side of each slice. This double layer ensures maximum gooeyness in every bite! Now, neatly arrange the banana slices in a single layer over the peanut butter on one slice.
Create the Masterpiece: Carefully place the second slice of bread on top, peanut butter side down, creating your sandwich. Press down gently to seal the edges slightly.
Butter Up for Crispiness: Now, spread softened butter liberally on the outside of the top slice of bread. Be generous – this is what creates that irresistible golden crust.
The Golden Griddle: Carefully place the sandwich, buttered-side down, onto your preheated skillet. While the first side cooks, quickly butter the now-top slice of bread that’s facing up.
The Patient Sizzle: Let the sandwich cook for 3-4 minutes. Resist the urge to peek too early! You’re waiting for that bottom slice to turn a deep, golden brown and become beautifully crispy. You should hear a gentle, satisfying sizzle.
The Perfect Flip: Once gorgeously golden, it’s time to flip! Use a wide, sturdy spatula. Carefully slide it under the sandwich and flip it confidently. Ah, that beautiful color!
Crisp to Perfection: Cook the second side for another 3-4 minutes, again until deeply golden brown and crispy. Press down very gently with the spatula once or twice to encourage even contact and melting.
The Moment of Truth: Transfer your masterpiece to a cutting board. Let it rest for just 60 seconds – this helps the molten filling settle slightly, preventing a volcanic eruption when you cut in. Then, slice diagonally (mandatory for peak enjoyment!) and witness the glorious ooze.
You Must Know: Secrets for Sandwich Success
Heat is Key: Medium-low is your friend! Too high = burnt bread, cold filling. Too low = soggy bread. Aim for a gentle sizzle.
Butter Generously: Don’t skimp on the outside butter. It’s the difference between good and legendary crispiness.
Ripe Bananas Rule: Underripe bananas won’t soften or sweeten enough. Spotty = perfect!
Press Gently: A light press after flipping helps, but don’t smash it flat – you want to preserve the fluffy interior.
Rest Briefly: That minute on the cutting board saves your fingers and lets the flavors meld perfectly.
Serving Ideas: Elevate the Experience
This sandwich is glorious solo, but here’s how to level up:
Drizzle Delight: A swirl of honey, maple syrup, or even chocolate sauce over the top is divine.
Crunch Factor: Sprinkle the peanut butter with chia seeds, chopped nuts, or granola before adding the banana.
Sweet & Salty Boost: A light sprinkle of flaky sea salt (like Maldon) on top after grilling is chef’s kiss.
Dip It: Serve with a small bowl of warm maple syrup or chocolate sauce for dunking.
Perfect Pairings: Enjoy with a cold glass of milk (classic!), a hot cup of coffee, or a creamy smoothie.
Make It Different: Endless Variations
Nut-Free: Use sunflower seed butter or soy nut butter.
Flavor Twists: Add a sprinkle of cinnamon, nutmeg, or pumpkin pie spice to the peanut butter. Stir a teaspoon of cocoa powder into the PB for a chocolatey twist.
Extra Indulgence: Add a thin layer of Nutella, chocolate chips, or mini marshmallows with the bananas. A slice of crispy bacon tucked inside adds amazing salty-sweet depth!
Fruity Fun: Add a few thinly sliced strawberries or raspberries with the banana.
Bread Swap: Try whole wheat, cinnamon swirl bread, or even croissants (split lengthwise) for a decadent treat.
Vegan: Use vegan butter and your favorite plant-based bread. Ensure peanut butter is vegan (most are).
Storage & Reheating Tips
Best Served Immediately: This sandwich truly shines hot off the griddle. The crispy texture is paramount.
Storage (If You Must): Let cool completely, wrap tightly in plastic wrap or foil, and refrigerate for up to 1 day. The bread will soften significantly.
Reheating: To revive some crispiness, reheat in a skillet over medium-low heat (like the initial cooking) for 2-3 minutes per side. A toaster oven on a low setting can also work, but watch closely. Microwaving is not recommended – it makes the bread very soggy.
Grilled Sandwich Success Tips
Cast Iron Champion: A well-seasoned cast iron skillet provides unbeatable, even heat distribution for that perfect crust.
Preheat Properly: Give your skillet/griddle ample time to reach a steady medium-low heat before adding the sandwich.
Don’t Crowd the Pan: Cook one sandwich at a time unless your pan is very large. Crowding lowers the temperature and leads to steaming instead of crisping.
Listen & Watch: The gentle sizzle and the visual cue of the browning crust are your best guides. Trust them over strict timers.
Quality Ingredients: Good bread, real butter, and ripe bananas make a noticeable difference.
Frequently Asked Questions (FAQ)
Can I use natural peanut butter? Yes, but be aware it can sometimes separate or be less smooth when heated. Stir it very well before using. Creamy commercial brands often melt more cohesively for that signature “ooze.”
My sandwich isn’t getting crispy! What’s wrong? Likely culprits: Heat too low, not enough butter on the bread, or flipping too soon. Ensure your pan is properly preheated at medium-low, butter generously, and wait for that deep golden brown before flipping.
Can I make this without butter? You can use a neutral oil (like avocado or canola) or coconut oil, but butter provides the best flavor and browning for that classic grilled sandwich taste and texture.
Is this sandwich healthy? It’s a treat! While bananas and peanut butter offer nutrients (potassium, healthy fats, protein), the butter, bread, and overall calorie count make it indulgent. Enjoy it mindfully as part of a balanced diet. See the nutrition disclaimer below.
Can I prep these ahead? You can slice the bananas ahead of time (sprinkle with a tiny bit of lemon juice to prevent browning) and have your bread and peanut butter ready. However, assembling and grilling should be done just before eating for optimal texture.
Grilled Peanut Butter Banana Sandwich Recipe Card
Yield: 1 glorious sandwich
Prep time: 5 minutes
Cook time: 6-8 minutes
Total time: 11-13 minutes
Category: Snack, Breakfast, Dessert
Difficulty: Easy
Cuisine: American
Ingredients
The Sandwich:
2 slices thick-cut bread (Brioche, Texas Toast, Sourdough, or Artisan White recommended)
3-4 tablespoons creamy peanut butter
1 medium-large ripe banana (with brown speckles), sliced into 1/4-inch rounds
For Cooking:
1-2 tablespoons salted butter, softened (for spreading)
Instructions
Heat Skillet: Place a skillet or griddle (cast iron preferred) over medium-low heat.
Prep Bread: Spread peanut butter evenly on one side of each slice of bread.
Add Banana: Arrange banana slices in a single layer over the peanut butter on one slice of bread.
Assemble: Place the second slice of bread on top, peanut butter side down, to form the sandwich. Press down gently.
Butter Outside: Spread softened butter generously over the top slice of bread.
Cook First Side: Carefully place the sandwich, buttered-side down, onto the preheated skillet.
Butter Top: While the first side cooks, spread butter generously over the top slice of bread (now facing up).
Cook Until Golden: Cook for 3-4 minutes, or until the bottom is deeply golden brown and crispy.
Flip Carefully: Using a wide spatula, carefully flip the sandwich over.
Cook Second Side: Cook for another 3-4 minutes, or until the second side is deeply golden brown and crispy. Press down gently once or twice with the spatula.
Rest & Serve: Transfer to a cutting board. Let rest for 1 minute. Slice diagonally and serve immediately.
Notes
Banana Ripeness: Using a very ripe banana (lots of brown spots) is crucial for maximum sweetness and soft texture.
Peanut Butter: Creamy commercial peanut butter melts smoother than natural, but natural can be used if well-stirred.
Butter Temperature: Softened butter spreads easily without tearing the bread. If using cold butter, slice it thinly.
Heat Management: Adjust heat as needed. If browning too fast, reduce heat; if too slow, increase slightly. Medium-low is the sweet spot.
Tools You’ll Need
Skillet or Griddle (Cast Iron recommended)
Small Knife & Cutting Board (for banana)
Butter Knife or Small Spatula (for spreading)
Wide Spatula (for flipping)
Measuring Spoons
Allergy Info
Contains: Peanuts, Wheat (gluten), Dairy (butter). May contain traces of other nuts depending on peanut butter brand.
Substitutions: Use sunflower seed butter (nut-free), gluten-free bread, and vegan butter/margarine for specific allergies.
Nutrition Disclaimer: The nutritional information for this recipe is an estimate provided for informational purposes only. Actual values can vary significantly based on the specific brands and quantities of ingredients used, as well as preparation methods. This recipe is intended as an indulgent treat.