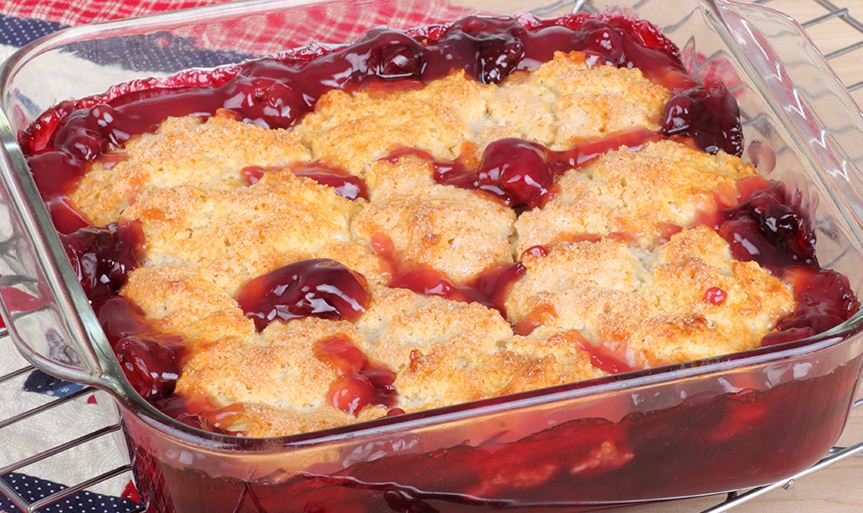
Classic Cherry Cobbler

Classic Cherry Cobbler

Classic Cherry Cobbler: The Ultimate Dessert Recipe

When it comes to comfort food, few desserts can compare to the rich, fruity, and downright indulgent taste of a classic cherry cobbler. This time-honored recipe blends the natural sweetness of cherries with a soft, buttery crust to create a mouthwatering treat perfect for any occasion. Whether you’re preparing a family meal or impressing guests at a gathering, this cobbler will always be a hit.

Why You Should Try a Classic Cherry Cobbler

A classic cherry cobbler isn’t just delicious—it’s a nostalgic dessert that evokes warm memories of home-cooked meals and cozy evenings. Its appeal lies in its simplicity and versatility. Whether served with a scoop of vanilla ice cream or whipped cream, the contrast of flavors and textures will leave everyone craving for more.

Moreover, cherries are packed with antioxidants and essential nutrients, making this dessert not only tasty but also beneficial. Now, let’s dive into the perfect cherry cobbler recipe that is sure to elevate your baking game.

Ingredients You’ll Need for the Perfect Cherry Cobbler

Filling Ingredients:

  • 5 cups of cherries, pitted: Use fresh cherries for the best flavor. However, frozen or canned cherries can work in a pinch, just ensure to drain any excess liquid.
  • ½ cup of water: Helps create the syrupy filling.
  • 1 ¼ cups of sugar: Sweetens the cherries and balances their natural tartness.
  • 4 tablespoons of cornstarch: Acts as a thickener to give the filling that perfect, jammy consistency.

Topping Ingredients:

  • 1 cup of flour: All-purpose flour works best, providing the right texture for the crust.
  • 3 tablespoons of chilled butter: Cold butter is essential for achieving a flaky, crumbly topping.
  • 1 teaspoon of baking powder: Helps the dough rise and creates a light texture.
  • ½ teaspoon of salt: Enhances flavor and balances the sweetness.
  • ¼ cup of milk: Adds moisture to the dough.
  • 1 teaspoon of white vinegar: Helps the milk react with the baking powder, giving the topping an extra lift.

Step-by-Step Guide to Make the Best Cherry Cobbler

Step 1: Preparing the Cherry Filling

To start, place the pitted cherries in a medium-sized saucepan. Add ½ cup of water, 1 ¼ cups of sugar, and 4 tablespoons of cornstarch to the pan. Turn the heat to medium-high and bring the mixture to a boil, stirring constantly. Once it reaches a boil, reduce the heat to low and allow the mixture to simmer for about 10 minutes, stirring occasionally. This step thickens the filling and allows the flavors to meld perfectly.

Step 2: Preparing the Topping

While the cherry filling is simmering, you can begin making the topping. In a large mixing bowl, combine 1 cup of flour, 1 teaspoon of baking powder, and ½ teaspoon of salt. Mix these dry ingredients well. Next, take the 3 tablespoons of chilled butter and cut it into small chunks. Using a pastry cutter or two knives, work the butter into the flour mixture until it resembles coarse crumbs. The key to a great cobbler topping is ensuring the butter stays cold so it creates that flaky, crumbly texture.

Step 3: Adding Milk and Vinegar

In a separate bowl, combine ¼ cup of milk with 1 teaspoon of white vinegar. This may sound unusual, but the vinegar interacts with the baking powder, helping the dough rise and giving it a tender texture. Once combined, slowly pour this mixture into the flour and butter mixture. Stir until just combined—be careful not to overmix as this can result in a tough topping.

Step 4: Assembling the Cobbler

Once the cherry filling is done simmering, pour it into an 8-inch square baking dish. Spread it evenly, making sure every corner is filled with that delicious cherry mixture. Using a spoon, drop 9 large spoonfuls of the dough over the cherries. Make sure they are evenly spaced across the top of the filling. Don’t worry if some cherry filling peeks through—it adds to the rustic charm of the dish!

Step 5: Baking the Cobbler

Preheat your oven to 425°F (220°C). Place the cobbler in the oven and bake for 25 to 30 minutes, or until the topping is golden brown and the filling is bubbling around the edges. The heavenly aroma of baked cherries and buttery crust will fill your kitchen, making it hard to wait!

Step 6: Serving Suggestions

Once out of the oven, let the cobbler cool slightly before serving. This allows the filling to set a little. Serve the cobbler warm, topped with a generous scoop of vanilla ice cream or whipped cream for an indulgent treat. For an added touch, sprinkle a pinch of cinnamon or a drizzle of honey over the ice cream.

Why This Cherry Cobbler Recipe Stands Out

There are countless cobbler recipes, but this classic cherry cobbler stands out for several reasons:

  1. The Perfect Filling: The combination of sweet and tart cherries, sugar, and cornstarch creates a rich, syrupy filling that pairs beautifully with the light, biscuit-like topping.
  2. The Buttery, Flaky Topping: Using chilled butter and the right balance of baking powder ensures the topping is crispy and golden on the outside, while soft and flaky on the inside.
  3. A Versatile Recipe: While cherries are the star of this dessert, you can easily swap them out for other fruits like peaches, blueberries, or even apples depending on the season.

Tips for Perfecting Your Cherry Cobbler

1. Use Fresh Cherries When Possible

While canned or frozen cherries can work, fresh cherries bring out the best flavors in this dish. If you opt for frozen or canned cherries, make sure to drain them thoroughly to avoid a watery filling.

2. Don’t Overmix the Topping

When making the topping, it’s essential to mix the ingredients just until combined. Overmixing will result in a dense, tough crust instead of a light, flaky one.

3. Adjust the Sweetness to Your Liking

If you prefer a slightly less sweet cobbler, feel free to reduce the sugar in the filling. The natural sweetness of the cherries should still shine through, especially if you’re using fresh, ripe fruit.

Frequently Asked Questions (FAQs)

1. Can I use other fruits for this cobbler recipe?
Absolutely! You can substitute cherries with peaches, blueberries, blackberries, or any other seasonal fruits you love.

2. Can I make cherry cobbler in advance?
Yes, you can prepare the cherry filling ahead of time and store it in the fridge. However, it’s best to bake the cobbler just before serving to enjoy the fresh, crispy topping.

3. What’s the best way to store leftovers?
Store any leftover cobbler in an airtight container in the refrigerator for up to 3 days. Reheat it in the oven to maintain the crispy texture of the topping.

4. Can I freeze cherry cobbler?
Yes, you can freeze cherry cobbler. After baking, allow it to cool completely before freezing. To reheat, bake it at 350°F until heated through.

5. Can I make this cobbler gluten-free?
Certainly! You can substitute the all-purpose flour with a gluten-free flour blend to make this recipe suitable for gluten-sensitive individuals.