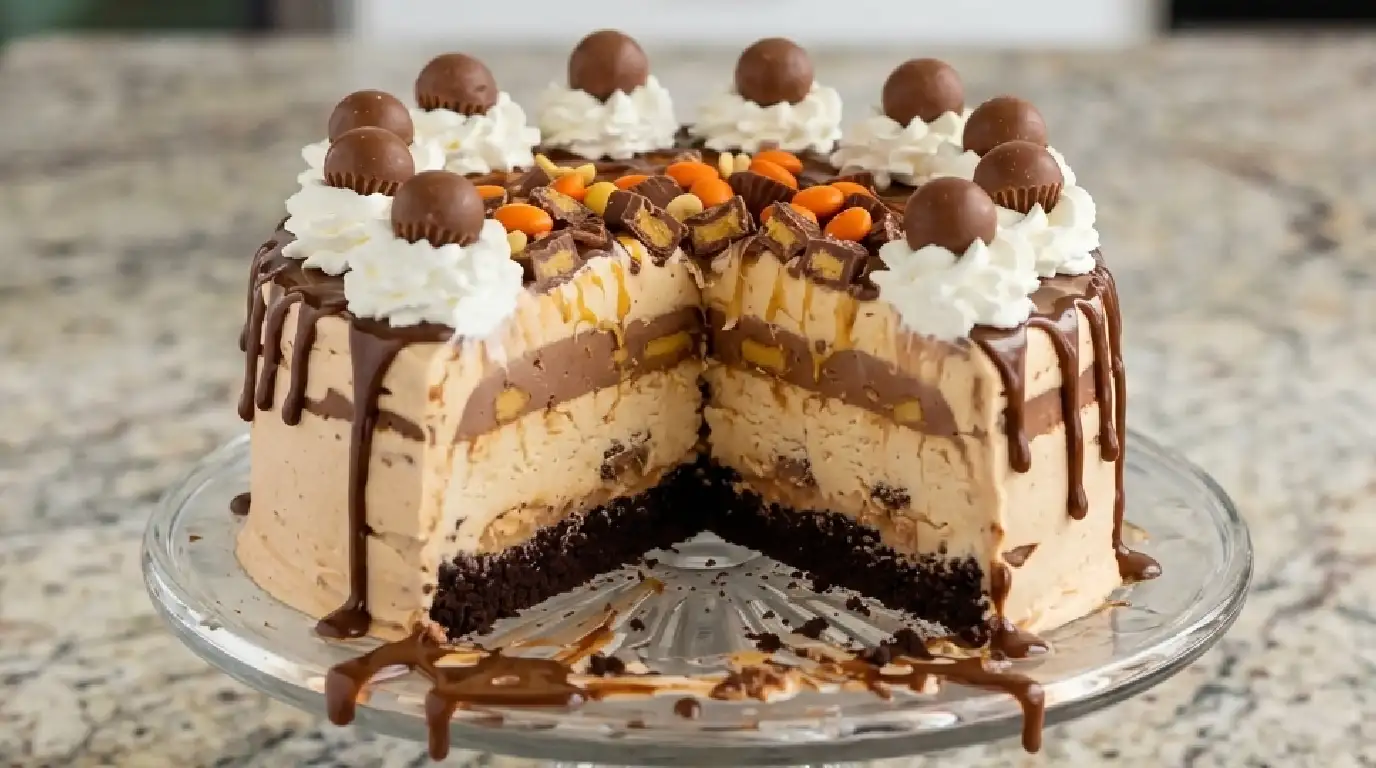
How to Make a Homemade Reese’s Peanut Butter Ice Cream Cake
There is something undeniably magical about the combination of salty peanut butter and rich milk chocolate. When summer heat hits, turning on the oven is the last thing anyone wants to do. While a light Strawberry Shortcake Cookies Recipe is perfect for a spring afternoon, this frozen peanut butter treat is exactly what you want when the thermometer climbs. It combines a crunchy cookie crust, velvety ice cream, and layers of chopped peanut butter cups into a dessert that tastes like it came from a high-end creamery. It is thick, decadent, and requires zero baking.
Why You’ll Love This
No oven required, meaning your kitchen stays completely cool.
Striking balance of textures, from the crunchy base to the smooth, creamy filling.
Simple to prep ahead of time for birthdays, potlucks, or weekend barbecues.
Deeply satisfying flavor profile that satisfies serious chocolate and peanut butter cravings.
The Backstory
This recipe came about during a family reunion where my uncle, a notoriously picky eater who claims he detests “overly sweet desserts,” was attendance. He usually skips the dessert table entirely, opting for a cup of black coffee. Knowing his secret weakness for peanut butter cups, I set this frozen cake on the table without saying a word. Not only did he finish his entire slice, but he also quietly asked if there were any leftovers he could take home. It has been a permanent fixture at our family gatherings ever since.
What Makes It Special
Crushed Chocolate Sandwich Cookies: This forms a sturdy, deeply chocolatey base that holds up beautifully to the heavy ice cream layers.
Premium Peanut Butter Ice Cream: Using a high-quality ice cream ensures a smooth texture that does not turn icy in the freezer.
Chopped Reese’s Cups: Scattering these throughout the layers provides a pleasant, cold chew and an intense burst of peanut flavor.
Fudge Sauce Drizzle: A thick ribbon of hot fudge inside the cake creates a gooey surprise when you cut into it.
Making It Happen
Preparing this frozen dessert is all about patience and timing. You start by crushing the chocolate cookies into fine crumbs, blending them thoroughly with melted butter until the mixture resembles wet sand. Press this firmly into the bottom of a springform pan to create an even crust, then slide it into the freezer to firm up. While the crust sets, let your ice cream sit on the counter for a few minutes until it reaches a spreadable consistency.
Once the crust is cold, spread half of the softened ice cream over the base. Drizzle a generous amount of chocolate fudge sauce over the top and scatter a heavy handful of chopped peanut butter cups. Layer the remaining ice cream over the candy, smoothing out the top with a spatula. The final touch involves adding more chopped candy and an extra swirl of fudge across the surface. The hardest part is waiting for the cake to freeze completely solid before unclamping the pan.
You Must Know
Let the ice cream soften naturally on the counter rather than microwaving it, which can cause it to melt unevenly and become icy when refrozen.
Pack the cookie crust down tightly using the flat bottom of a measuring cup to prevent it from crumbling when sliced.
Freeze the cake for at least six hours, or preferably overnight, so the center sets completely.
Serving Ideas & Pairings
Serve this rich cake in modest slices, as a little goes a long way. It pairs wonderfully with a cup of strong, unsweetened dark roast coffee or an espresso to balance the sweetness. For a kid-friendly option, a tall glass of ice-cold milk is classic. If you want to make the presentation extra special, serve each slice with a dollop of unsweetened fresh whipped cream and a few salted peanuts for contrast.
Make It Different
You can easily adapt this recipe to suit different tastes or dietary needs. Swap the chocolate sandwich cookies for graham crackers or vanilla wafers if you want a lighter crust. If you cannot find peanut butter ice cream, use a high-quality vanilla bean ice cream and swirl a few spoonfuls of creamy peanut butter directly into it. For a dairy-free version, look for oat milk-based chocolate or peanut butter ice creams and use plant-based butter for the crust.
Storage & Reheating
Because this is a frozen dessert, you will not be reheating this dish. Instead, proper storage is key to maintaining its texture. Keep the cake in the springform pan, wrapped tightly in two layers of plastic wrap followed by a layer of aluminum foil to prevent freezer burn. It will keep well in the deepest part of your freezer for up to two weeks. When you are ready to serve, let it sit on the counter for five minutes to make slicing easier.
Success Tips
To get clean, professional-looking slices, run a long, sharp chef’s knife under hot tap water for a few seconds, wipe it dry, and then make your cut. Repeat this heating and wiping process between every single slice to keep the layers from smudging. If the cake is sticking to the sides of the springform pan, run a warm, damp cloth around the outside of the metal ring before unclamping it.
Frequently Asked Questions (FAQ)
Can I make this recipe in a regular cake pan?
Yes, but you should line the pan with plastic wrap, leaving plenty of overhang on the sides so you can easily lift the entire frozen cake out before slicing.
How do I stop the crust from sticking to the bottom of the pan?
Lightly spraying the bottom of the pan with non-stick cooking spray before pressing the cookie crumbs down will help the crust release cleanly.
Can I use homemade ice cream for this?
Absolutely. Just make sure the homemade ice cream is churned to a soft-serve consistency before layering it into the cake pan.
What can I use instead of hot fudge sauce?
A high-quality chocolate syrup or a homemade chocolate ganache works perfectly as a replacement for the fudge sauce.
Can I add a layer of peanut butter sauce inside?
Yes, warming a bit of creamy peanut butter and drizzling it alongside the chocolate fudge sauce adds an extra layer of salty flavor.
Recipe Card Info
Prep time: 20 minutes
Cook time: 0 minutes
Total time: 6 hours 20 minutes (includes freezing time)
Servings: 12 servings
Category: Dessert
Difficulty: Easy
Cuisine: American
Yield: 1 9-inch cake
Equipment: 9-inch springform pan, food processor, offset spatula
Ingredients
24 chocolate sandwich cookies (like Oreos)
5 tablespoons unsalted butter, melted
1.5 quarts peanut butter ice cream, slightly softened
1 cup hot fudge sauce, divided
1.5 cups Reese’s peanut butter cups, chopped and divided
Instructions
Place the chocolate sandwich cookies into a food processor and pulse until they form fine crumbs.
Pour the melted butter over the cookie crumbs and pulse until the mixture is well combined and damp.
Press the crumb mixture firmly into the bottom of a 9-inch springform pan, creating an even layer. Freeze for 15 minutes.
Spread half of the softened peanut butter ice cream over the chilled cookie crust using an offset spatula.
Drizzle half of the fudge sauce over the ice cream layer, then sprinkle with half of the chopped peanut butter cups.
Carefully spread the remaining ice cream over the candy layer, smoothing the top completely.
Top the cake with the remaining chopped peanut butter cups and drizzle with the remaining fudge sauce.
Cover the pan loosely with plastic wrap and freeze for at least 6 hours, or until completely firm.
Run a warm knife around the edge of the pan before removing the springform ring. Slice with a hot knife and serve immediately.
Notes
For an extra layer of texture, you can add half a cup of chopped roasted peanuts along with the candy layers. Make sure your ice cream is spreadable but not melted, or the layers will blend together rather than staying distinct.
Nutrition
Calories: 450 kcal | Carbohydrates: 48g | Protein: 7g | Fat: 26g | Saturated Fat: 12g | Sodium: 290mg | Sugar: 36g