Orange Creamsicle Dream Bars: A Nostalgic No-Bake Dessert
There is something instantly transporting about the flavor combination of bright, zesty orange and sweet, mellow vanilla. For me, it triggers memories of chasing the ice cream truck down the street, clutching a handful of coins, hoping to score that classic orange-coated vanilla treat before it sold out.
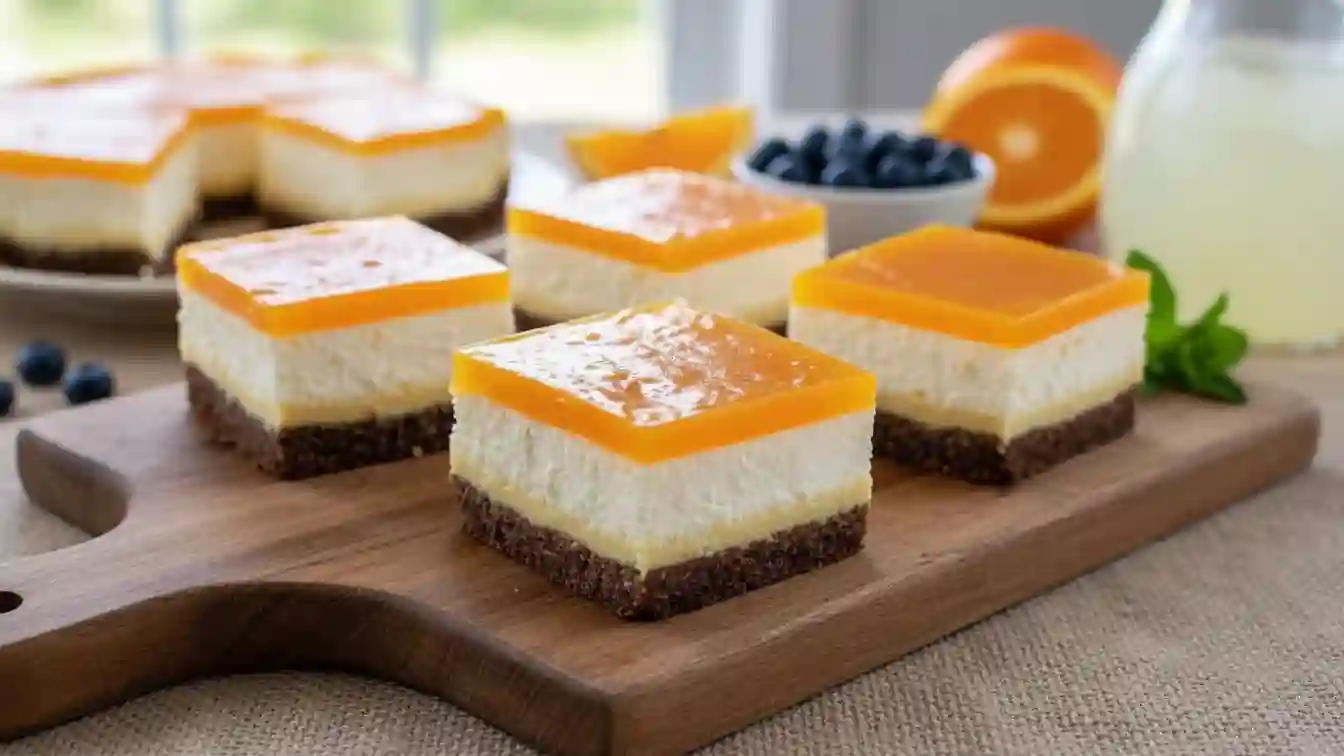
This Orange Creamsicle Dream Bars recipe takes that nostalgic childhood flavor and transforms it into a sophisticated, layered dessert that requires zero oven time. It creates a balance that is difficult to master but effortless to eat: a buttery, golden Nilla Wafer crust provides the crunch, while two distinct creamy layers—one a rich cheesecake white, the other a fluffy orange mousse—melt together in every bite. It is cool, creamy, and undeniably cheerful.
Why You’ll Love This
No Oven Required: This is the ultimate warm-weather lifesaver. You get a bakery-quality dessert without heating up the kitchen.
The Perfect Texture Contrast: The snap of the vanilla cookie crust creates a satisfying base for the silky, mousse-like filling.
Visual Appeal: The distinct layers of golden crust, creamy white cheesecake, and vibrant orange make these bars look impressive on a serving platter.
Crowd-Pleasing Flavor: It strikes a balance between fruity and creamy that appeals to both kids and adults.
The “Chocolate-Only” Convert
I brought a tray of these bars to a potluck last summer, fully expecting them to play second fiddle to the brownies and cookies. My brother-in-law is a self-proclaimed “chocolate-only” dessert eater; he usually bypasses fruit desserts entirely, claiming they aren’t indulgent enough. I watched him politely take a small square, mostly to be nice. A minute later, I saw him back at the dessert table, sliding two more bars onto his plate. He told me the texture reminded him of a high-end mousse cake, and the orange flavor wasn’t artificial or overpowering—it was just right. Now, he asks for them specifically for his birthday.
What Makes It Special
The magic of these Orange Creamsicle Dream Bars comes down to how specific ingredients interact to create stability and flavor without baking.
Nilla Wafers: Unlike a standard graham cracker crust, Nilla Wafers offer a stronger vanilla profile and a finer crumb that holds together beautifully when chilled.
Orange Extract: This provides a concentrated burst of citrus aroma that cuts through the richness of the dairy, ensuring the orange flavor doesn’t get lost.
Cream Cheese: Using room-temperature cream cheese ensures the filling is velvety and rich, anchoring the fluffier components so the bars slice cleanly.
Cool Whip: This is the secret to the “Dream” part of the name. It aerates the mixture, creating a cloud-like consistency that heavy cream sometimes struggles to maintain over several days.
Making It Happen
Creating these bars is less about cooking and more about assembly and patience. It starts with the foundation. You’ll take those Nilla Wafers and pulverize them into fine, sandy crumbs. When you mix them with the melted butter, the scent is intoxicating—pure vanilla comfort. You’ll press this firmly into your lined pan. Don’t be shy here; a tightly packed crust is the key to a bar that doesn’t crumble in your hand. This goes straight into the freezer to set up while you work on the rest.
Next comes the science of the orange layer. You need to bloom the orange gelatin in boiling water, but here is the trick: you cool it down with cold water and let it sit in the fridge until it’s cool but still liquid. If you rush this and pour hot liquid into your cream cheese mixture later, you’ll end up with a soupy mess.
While that cools, you build the white cheesecake layer. This is simply cream cheese, confectioners’ sugar, and vanilla beaten until smooth, then lightened by folding in Cool Whip. You’ll spread this over your frozen crust. It acts as a barrier and a flavor contrast.
Finally, the orange layer comes together. You beat the remaining cream cheese with sugar and extract, then slowly—very slowly—stream in that cooled gelatin mixture. Once combined, you fold in the rest of the Cool Whip. This creates a pale orange foam that you pour over the white layer. Then, the hardest part: waiting. It needs a long rest in the fridge to firm up into sliceable perfection.
You Must Know
Room Temperature is Key: Your cream cheese must be completely soft. If it is cold, you will end up with tiny white lumps in your orange layer that no amount of mixing will fix.
The Gelatin Timing: Watch your gelatin mixture in the fridge. You want it cool to the touch, but if it sits too long, it will turn into… well, Jell-O. You need it liquid enough to blend but cool enough not to melt the cheese.
Parchment Sling: When lining your pan, leave an overhang of parchment paper on two sides. This creates “handles” that allow you to lift the entire block out of the pan for perfect slicing later.
Fold, Don’t Stir: When adding the Cool Whip, use a gentle folding motion with a rubber spatula. Vigorous stirring will deflate the air bubbles, making the bars dense rather than fluffy.
Serving Ideas
These bars are rich, so they pair best with lighter accompaniments.
Drink Pairings: Serve with an unsweetened iced tea with a wedge of lemon to cut the sweetness, or a glass of cold prosecco for a brunch setting.
Garnish: A dollop of extra whipped topping and a small, fresh mandarin orange slice on top makes them look bakery-ready.
Texture: A sprinkle of crushed Nilla Wafers on top right before serving adds a nice crunch that mirrors the crust.
Make It Different
Dietary Adjustments: You can use low-fat cream cheese and sugar-free gelatin/Cool Whip to lighten the calorie load. The texture changes slightly (it becomes a bit softer), but it works well.
Flavor Swap: Not an orange fan? This exact method works perfectly with strawberry gelatin (and fresh strawberries on top) or lemon gelatin (with a drop of yellow food coloring).
Crust Alternatives: If you don’t have Nilla Wafers, Golden Oreos (filling removed) or classic graham crackers make excellent substitutes.
Storage and Recipe Tips
Storage
These bars must be kept cold. Store them in the refrigerator, covered tightly with plastic wrap or in an airtight container, for up to 5 days. Do not leave them out at room temperature for more than 30–45 minutes, or the layers may begin to soften too much.
Freezing
You can freeze these bars! Once fully set, wrap individual squares in plastic wrap and store them in a freezer bag. They eat wonderfully straight from the freezer (like an ice cream bar) or can be thawed in the fridge for 30 minutes.
Reheating
Do not reheat. These are strictly a chilled dessert.
Success Tips
The Slice: To get those chef-perfect sharp edges, run your knife under hot water and wipe it dry before every single cut. It melts through the layers cleanly.
Patience Pays Off: The recipe says “minimum 6 hours,” but overnight is truly best. The flavors meld together, and the crust softens just enough to become cake-like.
Food Coloring: The orange food coloring is optional. Without it, the top layer will be a very pale pastel peach. If you want that “Creamsicle” pop of color, use the gel coloring—it adds vibrancy without adding liquid.
Frequently Asked Questions
Can I use fresh whipped cream instead of Cool Whip?
Technically yes, but you must stabilize it (usually with gelatin or milk powder). Cool Whip contains stabilizers that ensure the bars hold their shape for days. Fresh cream may weep or deflate after 24 hours.
My orange layer has little chunks of gelatin in it. What happened?
This usually happens if the gelatin mixture got too cold and started to set before you mixed it into the cream cheese, or if you poured the mixture in too quickly. It’s still safe to eat and will taste delicious, it just changes the texture slightly.
Can I use a 9×13 pan instead?
Yes, but the bars will be much thinner. If you use a 9×13 pan, check the crust thickness; you might want to increase the crust ingredients by 50% to ensure the base holds up.
Why is my crust crumbly?
If the crust falls apart when you slice it, you likely didn’t press it down hard enough or didn’t use enough butter. Really put your weight into packing that crust down before freezing it.
Can I use fresh orange juice instead of water for the gelatin?
It is not recommended. The enzymes and acidity in fresh juice can sometimes interfere with how the gelatin sets, potentially leading to a runny filling. Stick to water and extract for the most consistent results.
Recipe Card
Orange Creamsicle Dream Bars
Prep Time: 30 minutes
Cook Time: 0 minutes (plus 6 hours chilling)
Total Time: 6 hours 30 minutes
Yield: 1 8×8 inch pan
Category: Dessert
Cuisine: American
Difficulty: Moderate
Ingredients
8 ounces Cool Whip (divided into 3 separate cups for easy measuring)
Nilla Wafer Crust
1 ⅓ cups Nilla Wafer Cookie Crumbs
5 tablespoons unsalted butter, melted
Orange Cream Layer
3 ounces orange gelatin (standard small box)
¾ cup boiling water
¾ cup cold water
8 ounces cream cheese, room temperature
¼ cup powdered sugar
2 teaspoons orange extract
8 drops orange Wilton Gel Food Color (optional)
2 cups Cool Whip (from the divided amount)
Cheesecake Layer
8 ounces cream cheese, room temperature
1 cup confectioners’ sugar
1 teaspoon pure vanilla extract
1 cup Cool Whip (from the divided amount)
Instructions
Prepare the Pan: Line an 8×8-inch baking pan with parchment paper, leaving an overhang on the sides so you can easily lift the bars out later.
Make the Crust: In a medium bowl, melt the 5 tablespoons of butter in the microwave (approx. 30 seconds). In a food processor, pulse the Nilla Wafers until they are fine crumbs. Add the crumbs to the melted butter and mix with a rubber spatula until fully incorporated.
Set the Crust: Pour the crumb mixture into the prepared pan. Spread evenly and press down firmly to create a compact, even crust. Place the pan into the freezer for at least 30 minutes.
Bloom the Gelatin: In a 2-cup measuring glass, mix the orange gelatin with ¾ cup boiling water. Stir until completely dissolved. Add the ¾ cup cold water and stir. Place in the refrigerator until completely cooled but not set (about 10 minutes).
Make the Orange Base: In a mixing bowl, beat 8 ounces of cream cheese with ¼ cup powdered sugar, orange extract, and orange food coloring until smooth.
Combine Gelatin and Cheese: Slowly pour the chilled gelatin liquid into the orange cream cheese mixture while beating. Note: Pour slowly to ensure a smooth consistency. Once smooth, place this mixture in the refrigerator to thicken for one hour. (See Notes).
Make the Cheesecake Layer: In a separate mixing bowl, beat the second 8 ounces of cream cheese, 1 cup confectioners’ sugar, and vanilla extract until smooth and creamy. gently fold in 1 cup of Cool Whip using a rubber spatula.
Layer the Dessert: Remove the crust from the freezer. Place dollops of the white cheesecake mixture onto the crust and spread into an even layer using an offset spatula.
Finish the Orange Layer: Remove the thickened orange mixture from the fridge. Gently fold in the remaining 2 cups of Cool Whip until evenly distributed and smooth.
Final Assembly: Gently pour the fluffy Orange Cream mixture over the white cheesecake layer and spread evenly.
Chill: Place the pan into the refrigerator overnight, or for a minimum of 6 hours, to fully set.
Notes
Water Ratios: Use the specific amounts of water listed in this recipe (¾ cup boiling, ¾ cup cold). Do not use the instructions on the gelatin box; we need a more stable, concentrated gelatin for these bars.
Chilling the Orange Base: If the Orange Cream mixture sits in the refrigerator for more than one hour before you add the Cool Whip, the gelatin will begin to harden firmly. If this happens, you will have orange gelatin “specks” in your top layer rather than a smooth mousse. This is purely aesthetic and will still taste delicious, so don’t worry if you miss the window slightly!
Nutrition Information
Calories: 320kcal | Carbohydrates: 34g | Protein: 3g | Fat: 19g | Saturated Fat: 12g | Cholesterol: 45mg | Sodium: 180mg | Sugar: 26g