Table of Contents
ToggleGooey Pecan Pie Brownies: The Ultimate Holiday Dessert Mashup
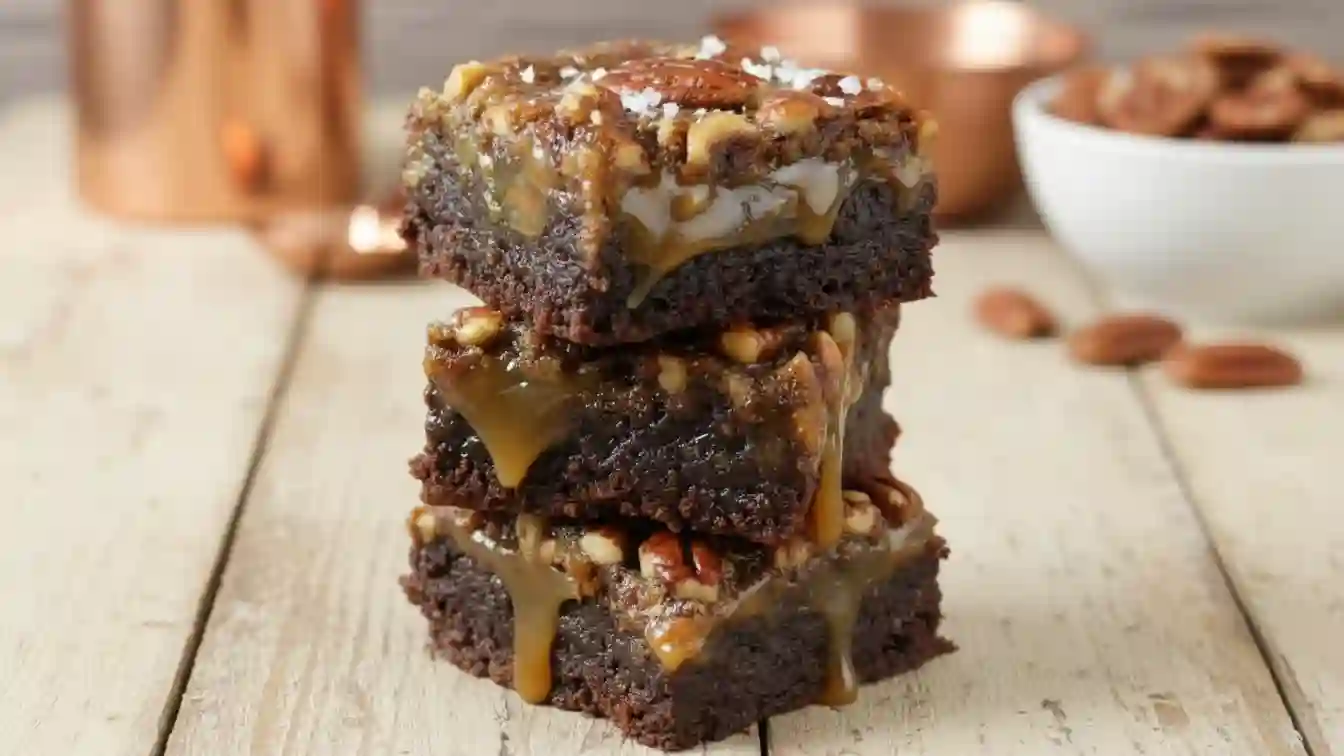
There’s a certain magic that happens when you combine two beloved desserts into one. It’s the culinary equivalent of a perfect hug. This recipe for Gooey Pecan Pie Brownies was born one chilly autumn afternoon when I simply couldn’t decide between a rich, fudgy brownie and the nostalgic, caramelized comfort of a pecan pie. Why choose, I thought? The result was nothing short of alchemy—a dense, chocolatey base crowned with a layer of sweet, buttery, and surprisingly sophisticated pecan pie filling. The first bite, with its crackly top, gooey center, and that satisfying crunch of toasted pecans, transported me straight to my happiest holiday memories. It’s the show-stopping treat that promises and delivers pure, unadulterated joy.
Why You’ll Love This
The Ultimate Two-in-One Treat: It satisfies both your chocolate cravings and your love for classic pecan pie in a single, unforgettable square.
Surprisingly Simple Elegance: While it looks and tastes like it came from a fancy bakery, the process is straightforward and uses mostly pantry staples.
A Certified Crowd-Pleaser: This is the dessert that disappears first from the potluck table and the one guests quietly ask you to make again.
Texture Heaven: Experience the perfect play of fudgy brownie, melty chocolate pieces, and the sticky, crunchy pecan layer in every bite.
I brought a batch of these to a casual dinner party, not thinking much of it. My friend’s husband, a self-proclaimed “not a dessert person” who usually passes on sweets, hovered near the platter. He took one “just to try.” Ten minutes later, he’d quietly eaten two more and was intently scanning for crumbs. The next week, I got a text from my friend: “John keeps asking if you’ll share ‘that brownie recipe.’ He says it’s the only dessert he’s ever actually wanted seconds of.” Sometimes, the highest praise comes from the most unexpected places.
What Makes It Special
Two-Layer Magic: The recipe isn’t just a mixing of ingredients; it’s a deliberate creation of two distinct, complementary layers that bake into one harmonious bar.
Real Maple Syrup: Using pure maple syrup in the pecan layer, rather than just corn syrup, adds a complex, warm sweetness that elevates the entire dish.
Double Chocolate Punch: A blend of semi-sweet chips and broken dark chocolate pieces ensures deep, rich chocolate flavor in the brownie base.
The Salt Finish: A sprinkle of flaky sea salt at the end isn’t just for looks—it cuts the sweetness and makes every flavor pop.
Making It Happen
Start by warming your oven and lining your pan. This simple step of parchment paper is your best friend for clean, easy slices later. We begin with the brownie layer. Gently melt together the butter and most of the chocolate chips until smooth and glossy. Stir in the sugar and vanilla—your kitchen already smells incredible.
Now, take a minute to whisk your eggs until they’re frothy and light. This little bit of effort adds air, promising a crackly top on your brownies. Whisk them into the chocolate mixture; watch as it turns thick, shiny, and utterly luxurious. Gently fold in the dry ingredients and the remaining chocolate chips, then spread this decadent batter into your pan. A brief 15-20 minutes in the oven is all it needs to set the stage. As it bakes, scatter those dark chocolate pieces over the top—they’ll melt into lovely pockets of pure chocolate.
While the brownie par-bakes, create the pecan pie filling. Whisk the brown sugar and eggs until they turn pale and creamy, which builds structure. Stream in the maple syrup and heavy cream, followed by the melted butter and vanilla. The mixture will be silky and fragrant. Finally, fold in your chopped pecans. Once the brownie base is ready, gently pour this luscious filling right over the top, spreading the pecans evenly.
Return the pan to the oven. Now, patience is key. Bake until the edges are firm and the center is just set with a gentle, tempting jiggle. Let the pan cool completely on a rack. This waiting period is crucial for those perfect, clean slices that reveal the beautiful layers.
You Must Know
Room Temperature is Key: Using room-temperature eggs helps them incorporate smoothly into both batters, preventing the chocolate from seizing and helping the pecan layer emulsify properly.
Don’t Overbake the Base: The initial brownie bake is just to set it, not cook it through. It will finish baking with the pecan layer.
The Jiggle Test: The pecan layer is done when the edges are puffed and the center has a slight, sticky jiggle—it will set further as it cools.
Cool Completely: Resisting the urge to slice while warm is tough, but it guarantees you won’t have a gooey mess. The bars firm up beautifully as they cool.
Serving Ideas
Serve these brownies at room temperature with a dollop of barely sweetened whipped cream or a scoop of vanilla bean ice cream. For a truly decadent experience, drizzle with a little extra warm maple syrup. Pair with a strong cup of black coffee, a glass of cold milk, or even a neat pour of bourbon to complement the toasted pecan flavors.
Make It Different
Nut-Free: Substitute the pecans with an equal amount of toasted, unsweetened coconut flakes for a twist.
Gluten-Free: Use a trusted 1:1 gluten-free flour blend in place of the all-purpose flour.
Boozy Kick: Add a tablespoon of bourbon or rum to the pecan pie filling for an adult-only version.
Extra Chocolate: Use all semi-sweet chocolate chips if you don’t have dark chocolate on hand.
Storing Your Masterpiece
Store cooled brownies in an airtight container at room temperature for up to 3 days. For longer storage, they freeze beautifully. Wrap individual bars tightly in plastic wrap and place in a freezer bag for up to 3 months. Thaw at room temperature. There’s no need to reheat, but a 10-second burst in the microwave can restore that just-baked, gooey warmth.
Success Tips
The quality of your maple syrup truly matters here—the better the syrup, the deeper the flavor. When chopping pecans, leave some larger pieces for great texture. And finally, trust your instincts and your oven. Baking times can vary, so focus on the visual and tactile cues (set edges, jiggly center) rather than the clock alone.
Frequently Asked Questions
Can I use store-bought brownie mix for the base?
You can for a shortcut. Prepare a 9×9 sized mix according to package directions, but only bake it for about 5-10 minutes less than directed before adding the pecan layer and finishing the bake.
How do I get clean, sharp slices?
Use a very sharp knife and wipe it clean with a damp cloth between each cut. Chilling the entire pan of cooled brownies in the fridge for 30 minutes before slicing also helps immensely.
Can I freeze these brownies?
Absolutely! They freeze perfectly. Cool completely, slice, then wrap each bar individually before freezing in a bag for up to 3 months.
What can I use instead of a 9×9 pan?
An 8×8 pan will work, but your bars will be thicker and may require a slightly longer baking time. A 9×13 pan will yield thinner bars; you may want to consider increasing the recipe by half.
My pecan layer is still very liquid after the bake time. What happened?
Oven temperatures can vary. Simply continue baking in 5-minute increments, checking often, until the center is no longer liquid and has a consistent, sticky-jiggle throughout.
Gooey Pecan Pie Brownies
Prep Time: 30 minutes
Cook Time: 45 minutes
Total Time: 1 hour 15 minutes
Servings: 16 bars
Category: Dessert
Difficulty: Intermediate
Cuisine: American
Yield: One 9×9-inch pan
Ingredients
Brownie Layer
1 stick (1/2 cup) salted butter
1 cup semi-sweet chocolate chips, divided
¾ cup granulated sugar
2 tsp vanilla extract
2 large eggs, at room temperature
¼ cup all-purpose flour
¼ cup unsweetened cocoa powder
½ tsp baking powder
2 oz dark chocolate, broken into pieces
Pecan Pie Layer
½ cup brown sugar
2 large eggs
1 egg yolk
⅓ cup pure maple syrup
⅓ cup heavy cream
2 tbsp salted butter, melted
2 tsp vanilla extract
1 ½ cups pecans, chopped
Flaky sea salt, for sprinkling
Directions
Preheat oven to 350°F (175°C). Line a 9×9-inch square baking pan with parchment paper, leaving an overhang on two sides for easy removal.
For the Brownie Layer: In a large, microwave-safe bowl, combine the butter and ¾ cup of the chocolate chips. Microwave in 30-second bursts, stirring between each, until completely melted and smooth. Stir in the granulated sugar and vanilla extract.
In a separate small bowl, vigorously whisk the 2 eggs for about 1 minute until frothy and bubbly on top. Whisk the eggs into the chocolate mixture until the batter becomes thick, smooth, and glossy.
Sift the flour, cocoa powder, and baking powder directly into the wet ingredients. Gently fold with a spatula until almost combined, then fold in the remaining ¼ cup of chocolate chips. Spread the batter evenly into the prepared pan. Bake for 15-20 minutes, until the top is just set and the edges begin to pull away slightly. Remove from the oven and immediately scatter the broken dark chocolate pieces over the hot surface.
For the Pecan Pie Layer: While the brownie bakes, prepare the filling. In a medium bowl, whisk together the brown sugar, 2 eggs, and 1 egg yolk for 3-4 minutes until pale and slightly thickened. Whisk in the maple syrup and heavy cream until smooth. Finally, whisk in the melted butter and vanilla. Fold in the chopped pecans.
Gently pour the pecan filling over the pre-baked brownie base, spreading the pecans into an even layer.
Return the pan to the oven and bake for 30-35 minutes, or until the pecan layer is puffed at the edges and the center is set but still has a slight, sticky jiggle. If the center still looks very liquid, continue baking in 5-minute increments.
Remove from the oven and place the pan on a wire rack. Immediately sprinkle with a pinch of flaky sea salt. Allow the brownies to cool completely in the pan—this is essential for clean slicing.
Once fully cooled, use the parchment paper overhang to lift the entire slab onto a cutting board. Slice into 16 squares and serve.