Table of Contents
ToggleBetter Than Frozen: The Ultimate Easy Cheesy Homemade Pizza Pockets Recipe
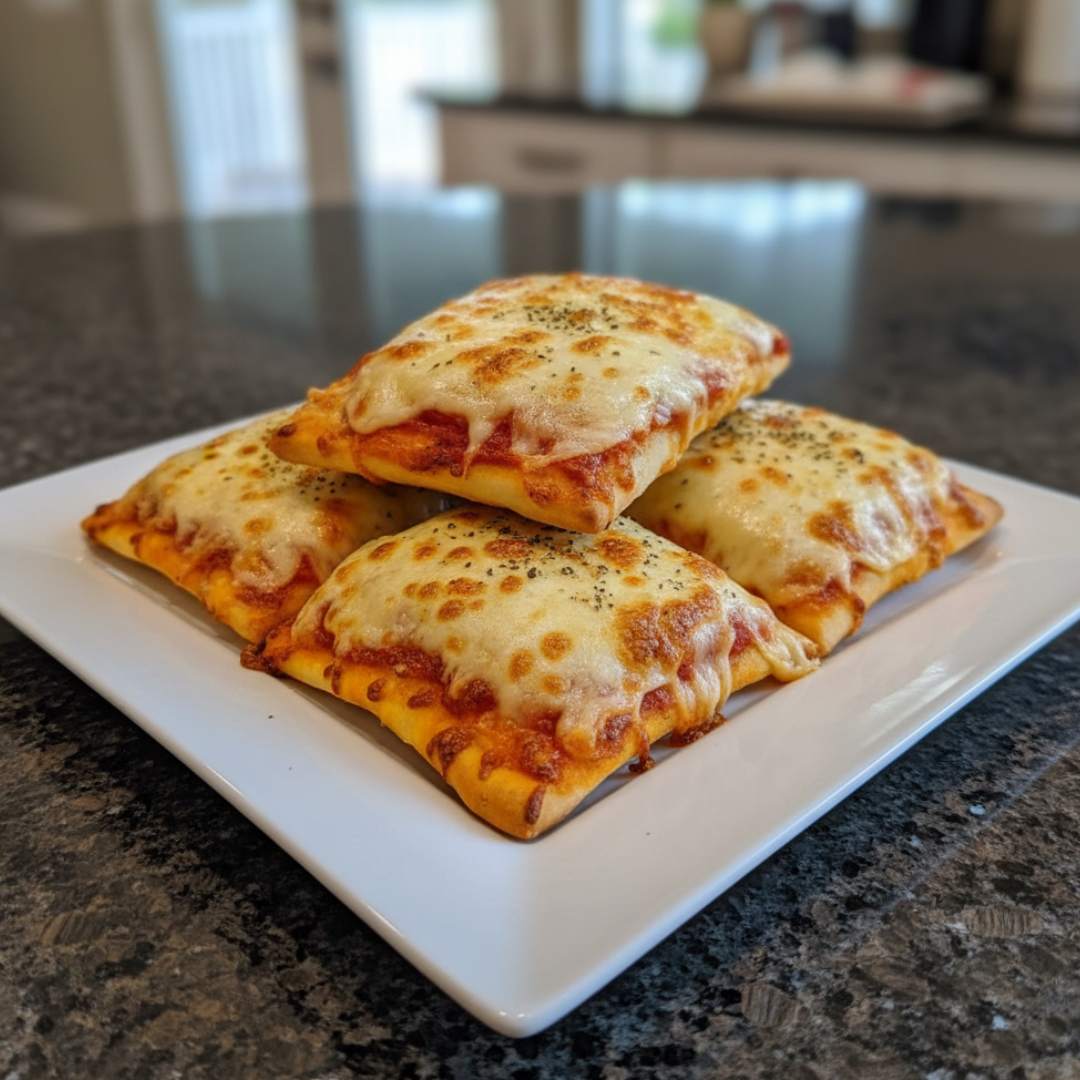
There is a specific kind of magic that happens in a kitchen when the scent of toasting dough and bubbling mozzarella begins to waft through the air. We all remember those frozen pizza snacks from childhood—the ones that were always scorching hot in the middle and icy on the edges. This recipe is the grown-up, homemade answer to those cravings. These pizza pockets are everything a quick dinner should be: crispy on the outside, incredibly gooey on the inside, and infused with that nostalgic pizzeria flavor. Whether it is a frantic Tuesday night or a lazy Sunday afternoon, pulling these golden, herb-dusted triangles out of the oven feels like a tiny culinary victory.
Why You’ll Love This
Zero Stress Preparation: Using refrigerated dough means you get to skip the floury mess of making crust from scratch while still enjoying a fresh-baked taste.
The Ultimate Crowd-Pleaser: It is nearly impossible to find someone who doesn’t enjoy the classic combination of pepperoni, melted cheese, and savory sauce.
Perfectly Portable: These are mess-free enough for kids to eat on the go or for you to enjoy as a quick desk lunch the next day.
Customizable Comfort: While the base recipe is a classic, these act as a blank canvas for whatever ingredients you happen to have in your fridge.
Last winter, my cousin brought over her notoriously picky seven-year-old for a surprise visit. This is a child who considers plain white toast a “bold choice” and usually refuses anything with a hint of color or texture. I was nervous about serving anything more complex than a glass of water. When I pulled these pizza pockets out of the oven, the sight of the bubbling cheese and the golden crust actually caught his interest. He didn’t just eat one; he finished two and asked if we could make them again for his birthday. It was the ultimate stamp of approval from the toughest critic I know.
What Makes It Special
Refrigerated Pizza Crust: This provides a buttery, tender base that crisps up beautifully without the hours of rising time required by traditional yeast doughs.
High-Quality Mozzarella: Using a full-cup of cheese ensures that iconic, stretchy cheese pull that makes every bite feel indulgent.
Classic Pepperoni: These thin slices provide a salty, slightly spicy kick that cuts through the richness of the cheese.
Dried Oregano: An optional but essential aromatic that elevates the scent and flavor to match your favorite local Italian spot.
Making It Happen
The process begins by setting your oven to a hot 425F, allowing it to fully preheat so the crust hits the heat and begins to crisp immediately. You will start by rolling out your refrigerated pizza crust onto a sheet of parchment paper. The goal is a flat, even surface that allows you to cut six uniform squares.
Once your dough is prepped, the assembly is simple but satisfying. On one half of each square, you will spread a tablespoon of rich pasta sauce, followed by a generous handful of mozzarella and two slices of pepperoni. The key is the fold. Bring the empty half of the dough over the filling to create a triangle. Using the tines of a fork, press firmly along the edges to crimp them shut. This creates a beautiful rustic pattern and, more importantly, keeps the cheese from escaping during the bake.
For a professional finish, a quick brush of oil on the top and a sprinkle of oregano and extra cheese adds a layer of flavor and a beautiful golden-brown color. Slide them into the oven for about ten to thirteen minutes. You are looking for a deep golden hue and edges that sound hollow when tapped. Serve them warm with a side of extra sauce for dipping, and watch how fast they disappear.
You Must Know
Avoid Overfilling: It is tempting to pile on the cheese, but too much filling can cause the pockets to burst or prevent the edges from sealing properly.
The Fork Seal is Critical: Be sure to press down firmly with your fork. If the seal is weak, the steam will push the sauce and cheese out of the sides.
Room Temperature Dough: If your dough is too cold, it might be snappy and hard to stretch. Letting it sit on the counter for five minutes before rolling can make it much more pliable.
Serving Ideas
These pizza pockets are a meal in themselves, but they pair beautifully with a crisp Caesar salad or a plate of roasted zucchini to add some freshness to the plate. For a beverage, a cold sparkling water with a twist of lime or a classic root beer hits that nostalgic note perfectly. If you are serving these as an appetizer for adults, a light-bodied red wine like a Chianti balances the acidity of the tomato sauce wonderfully.
Make It Different
The Garden Pocket: Swap the pepperoni for finely chopped bell peppers, spinach, and mushrooms for a vegetarian-friendly version.
The Meat Lovers: Add cooked sausage crumbles and chopped ham alongside the pepperoni for a heartier, protein-packed filling.
White Pizza Style: Skip the red sauce and use a dollop of ricotta cheese and a dash of garlic powder for a creamy, sophisticated twist.
Spicy Kick: Add a few red pepper flakes or a slice of jalapeño inside the pocket before sealing.
Storage and Reheating
If you happen to have leftovers, these store exceptionally well. Place them in an airtight container in the refrigerator for up to three days. To keep that crispy texture, avoid the microwave if possible. Instead, reheat them in a toaster oven or the main oven at 350F for about 5–8 minutes. If you want to freeze them, wrap the unbaked pockets individually in plastic wrap and store them in a freezer bag. You can bake them straight from frozen; just add an extra 5 minutes to the cooking time.
Success Tips
For the absolute best results, use a dark baking sheet or a preheated pizza stone. This ensures the bottom of the pizza pocket gets just as crispy as the top, avoiding the dreaded “soggy bottom.” Also, if you want a glossier, more golden finish, you can swap the oil brush for an egg wash (one egg beaten with a teaspoon of water). This gives the crust a bakery-style sheen that looks incredible on the plate.
Frequently Asked Questions
Can I use homemade pizza dough instead of the tube?
Absolutely. Just make sure to roll it out quite thin, as homemade dough tends to rise more than the refrigerated variety.
How do I prevent the bottom from getting soggy?
Using parchment paper helps, but the real secret is making sure your oven is fully preheated to 425F before the tray goes in.
What kind of pasta sauce works best?
A thick marinara or a dedicated pizza sauce is best. If the sauce is too watery, it can soak into the dough and make it difficult to seal.
Can I make these in an air fryer?
Yes! Air fry at 375F for about 8–10 minutes, flipping halfway through. Keep a close eye on them as air fryers vary in intensity.
Do I have to use pepperoni?
Not at all. You can use any toppings you like, provided they are precooked (like sausage) or don’t require much time to soften (like thin-sliced onions).
Easy Cheesy Homemade Pizza Pockets
Prep time: 10 minutes
Cook time: 12 minutes
Total time: 22 minutes
Servings: 6 pockets
Category: Main Course / Snack
Difficulty: Easy
Cuisine: American / Italian-Inspired
Yield: 6 Pizza Pockets
Equipment
Baking sheet
Parchment paper
Knife or pizza cutter
Fork
Pastry brush (optional)
Ingredients
1 refrigerated tube of pizza crust
6 Tablespoons of pasta sauce
1 cup of mozzarella cheese
Approximately 12 pepperoni slices
Sprinkle of oregano leaves (optional)
Instructions
Preheat the oven to 425F.
Open the tube of pizza crust and roll it flat on a piece of parchment paper or on a floured surface.
Cut the pizza crust into 6 equal squares.
Add about 1 Tablespoon of pasta sauce, a portion of the mozzarella cheese, and 2 pepperoni slices to one half of each square.
Fold the dough over each square to create a triangular shape. Seal the edges tightly by pressing down with the tines of a fork.
Optional: Brush the top of each triangle with a small amount of oil. Sprinkle some dried oregano leaves and a tiny bit of extra mozzarella cheese on top.
Bake at 425F for 10 to 13 minutes until the crust is golden brown and the cheese is bubbling.
Serve warm with a small bowl of pasta sauce on the side for dipping.
Notes
Ensure the edges are completely dry before crimping; if sauce gets on the edge, the dough may slide apart during baking. If using frozen pepperoni, pat it dry with a paper towel first to remove excess moisture.
Nutrition
Estimated per pocket: 280 kcal | Carbohydrates: 30g | Protein: 12g | Fat: 14g | Sodium: 650mg