Cheesy Garlic Bombs
1. Introduction
What are Cheesy Garlic Bombs?
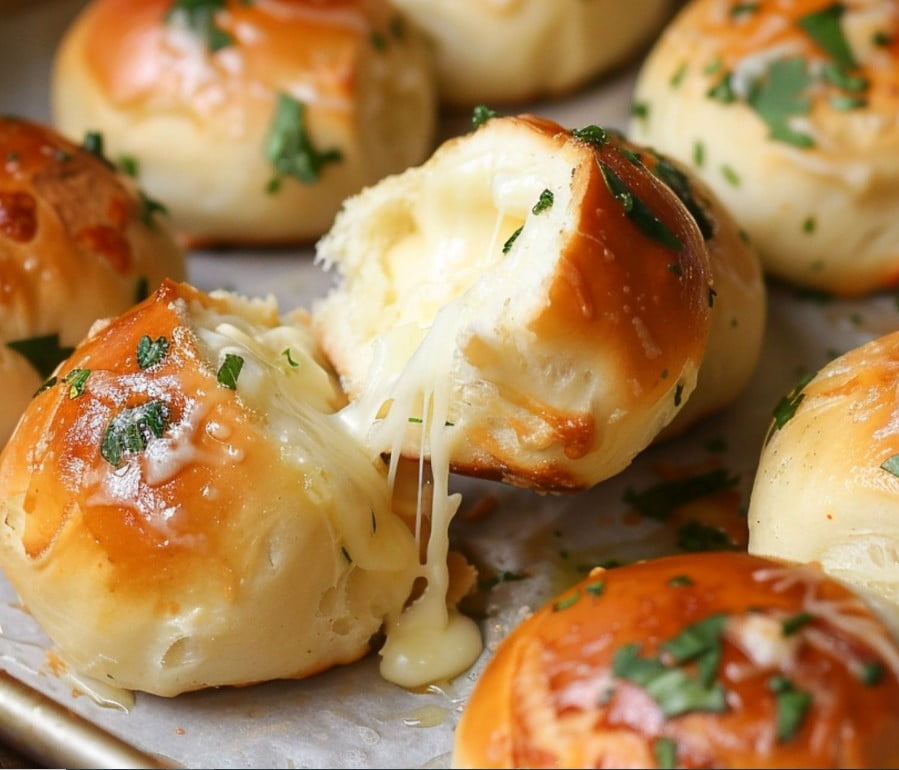
Cheesy Garlic Bombs are delightful, bite-sized pieces of heaven. These little bundles of joy are made from dough filled with gooey cheese and smothered in a rich, garlicky butter. They’re perfect for any occasion, from casual get-togethers to elegant dinners. Imagine biting into a soft, warm bread ball that bursts with cheese and the comforting aroma of garlic. Sounds irresistible, right?
History and Origin of Cheesy Garlic Bombs
While the exact origin of Cheesy Garlic Bombs is somewhat murky, these treats are likely a modern twist on traditional garlic bread. Garlic bread itself has roots in ancient Rome, where it was common to rub toasted bread with garlic and top it with olive oil. Fast forward a few centuries, and you have garlic knots, which became a staple in Italian-American cuisine. Cheesy Garlic Bombs are the next evolution, combining the best of both worlds: garlic bread and cheese-filled delights.
Popularity in Modern Cuisine
In today’s culinary landscape, Cheesy Garlic Bombs have taken center stage at many gatherings and restaurants. Their popularity can be attributed to the universal love for cheese and garlic. From food trucks to fine dining, these savory snacks have found their way onto menus worldwide. They’re a hit at parties, game nights, and even as a side dish to a main meal.
Overview of the Blog Post
In this blog post, we’ll dive deep into the world of Cheesy Garlic Bombs. We’ll explore everything from the essential ingredients and preparation methods to serving suggestions and health considerations. Whether you’re a seasoned chef or a kitchen newbie, this guide will equip you with all the knowledge you need to create these delectable treats at home.
2. Ingredients and Preparation
Essential Ingredients for Cheesy Garlic Bombs
To make Cheesy Garlic Bombs, you’ll need a handful of basic ingredients:
- Dough: You can use store-bought pizza dough or make your own.
- Cheese: Mozzarella is a favorite, but cheddar or a blend of cheeses works too.
- Garlic: Fresh garlic cloves for the best flavor.
- Butter: Unsalted butter to control the saltiness.
- Parsley: Fresh parsley adds a pop of color and freshness.
- Seasonings: Salt, pepper, and a pinch of red pepper flakes for some heat.
Variations in Ingredients
While the basic ingredients are straightforward, there are plenty of ways to customize your Cheesy Garlic Bombs:
- Cheese Variations: Try using a mix of mozzarella, provolone, and parmesan for a more complex flavor.
- Herbs and Spices: Add rosemary, thyme, or basil to the garlic butter for an aromatic twist.
- Dough Options: Experiment with whole wheat dough, gluten-free dough, or even puff pastry for different textures.
- Fillings: Add a small piece of pepperoni, sun-dried tomato, or a dollop of pesto inside each bomb for a surprise burst of flavor.
Preparation Time and Serving Size
Cheesy Garlic Bombs are relatively quick to prepare. From start to finish, you can expect to spend about 30 to 45 minutes:
- Prep Time: 15 minutes to prepare the dough and garlic butter.
- Assembly Time: 10 minutes to stuff and roll the dough balls.
- Baking Time: 10 to 15 minutes in the oven.
This recipe makes about 12 to 16 bombs, depending on the size of your dough balls. It’s perfect for serving a small crowd or as an appetizer.
Necessary Kitchen Tools
To make Cheesy Garlic Bombs, you’ll need:
- Mixing Bowls: For preparing the dough and garlic butter.
- Baking Sheet: Lined with parchment paper to prevent sticking.
- Pastry Brush: For applying the garlic butter.
- Knife and Cutting Board: For chopping garlic and parsley.
- Measuring Cups and Spoons: To ensure accurate ingredient quantities.
3. Step-by-Step Cooking Instructions
Preparing the Dough
- Start with the Dough: If using store-bought dough, let it come to room temperature. If making your own, mix flour, yeast, salt, and water in a bowl. Knead until smooth and elastic.
- Rest the Dough: Cover the dough with a damp cloth and let it rise in a warm place for about an hour, or until doubled in size.
Making the Garlic Butter Mixture
- Melt the Butter: In a small saucepan, melt the butter over low heat.
- Add Garlic: Mince the garlic cloves finely and add them to the melted butter. Let it cook for a minute or two until fragrant.
- Add Herbs: Stir in the chopped parsley and season with salt, pepper, and red pepper flakes. Remove from heat and set aside.
Assembling the Bombs
- Preheat the Oven: Set your oven to 375°F (190°C) and line a baking sheet with parchment paper.
- Roll the Dough: On a floured surface, roll the dough into a log and cut it into 12 to 16 equal pieces.
- Add Cheese: Flatten each piece of dough, place a small chunk of cheese in the center, and fold the dough over to seal it into a ball.
- Brush with Garlic Butter: Arrange the dough balls on the baking sheet. Use a pastry brush to coat each one generously with the garlic butter mixture.
Baking Process
- Bake: Place the baking sheet in the preheated oven and bake for 10-15 minutes, or until the bombs are golden brown and the cheese is melted.
- Cool and Serve: Let them cool for a few minutes before serving to avoid burning your mouth with hot cheese.
4. Tips and Tricks for Perfect Cheesy Garlic Bombs
Ensuring the Dough Rises Perfectly
- Warm Environment: Let the dough rise in a warm, draft-free area. An oven with the light on works well.
- Proper Kneading: Knead the dough until it’s smooth and elastic. This helps develop the gluten for a good rise.
- Resting Time: Don’t rush the resting period. Giving the dough enough time to rise is crucial for light, fluffy bombs.
Achieving the Right Cheese Melt
- Cheese Chunks: Use small chunks of cheese instead of grated cheese to avoid it leaking out.
- Even Distribution: Ensure the cheese is centered in the dough to prevent it from escaping during baking.
- Proper Sealing: Pinch the dough tightly around the cheese to seal it well.
Tips for a Crispy Outside and Soft Inside
- High Heat: Bake at a high temperature (375°F/190°C) to get a crispy exterior while keeping the inside soft.
- Butter Brush: Don’t skimp on the garlic butter. It adds flavor and helps with the crispiness.
- Preheating: Always preheat your oven to ensure even baking.
Common Mistakes to Avoid
- Overfilling with Cheese: Too much cheese can cause leaks. Stick to a small chunk per dough piece.
- Under-baking: Make sure the bombs are golden brown. Under-baking can leave the dough raw in the center.
- Skipping the Rest: Let the dough rest after kneading and before baking to get the best texture.
5. Serving Suggestions and Pairings
Best Times to Serve Cheesy Garlic Bombs
Cheesy Garlic Bombs are versatile and can be served:
- As an Appetizer: Perfect for starting a meal.
- Party Snacks: A hit at gatherings and celebrations.
- Game Day Treats: Great for munching during sports events.
- Side Dish: Pairs well with soups, salads, or pasta.
Complementary Dishes and Drinks
Cheesy Garlic Bombs pair well with:
- Marinara Sauce: A classic dipping sauce.
- Salads: A fresh, green salad balances the richness.
- Pasta Dishes: Complements any pasta with tomato or cream sauce.
- Drinks: Serve with wine, beer, or sparkling water for a refreshing contrast.
Creative Serving Ideas
- Cheese Board Addition: Add them to a cheese and charcuterie board.
- Soup Companion: Serve alongside tomato or minestrone soup.
- Brunch Item: Include them in a brunch spread with eggs and bacon.
- Picnic Snack: Easy to pack and enjoy outdoors.
Storing and Reheating Leftovers
- Storage: Keep leftovers in an airtight container in the refrigerator for up to 3 days.
- Reheating: Reheat in the oven at 350°F (175°C) for 5-7 minutes to maintain crispiness. Avoid microwaving as it can make the dough chewy.
6. Health Considerations and Modifications
Nutritional Information
Cheesy Garlic Bombs are indulgent but can be enjoyed in moderation:
- Calories: Approximately 120-150 per bomb.
- Fat: Around 7-9 grams, depending on cheese and butter used.
- Carbohydrates: Roughly 15-18 grams per bomb.
- Protein: About 4-6 grams per serving.
Healthier Ingredient Substitutions
- Whole Wheat Dough: Use whole wheat flour for added fiber.
- Low-Fat Cheese: Opt for low-fat mozzarella or cheddar.
- Olive Oil: Substitute butter with olive oil for a healthier fat option.
- Herbs: Increase the amount of herbs for flavor without extra calories.
Gluten-Free and Vegan Options
- Gluten-Free Dough: Use a gluten-free dough recipe or store-bought option.
- Vegan Cheese: Substitute dairy cheese with vegan cheese alternatives.
- Vegan Butter: Use plant-based butter and ensure other ingredients are vegan-friendly.
Managing Portion Sizes
- Smaller Portions: Make mini bombs by cutting smaller dough pieces.
- Serving Size: Limit to 2-3 bombs per person as part of a balanced meal.
- Pair with Veggies: Serve with a large salad or steamed vegetables to increase the meal’s nutritional value.
7. Cheesy Garlic Bombs Around the World
Regional Variations and Adaptations
Cheesy Garlic Bombs have been adapted worldwide:
- Italian Twist: Use ricotta and basil for an Italian version.
- Mexican Style: Add jalapeños and cilantro for a spicy kick.
- French Influence: Use brie and thyme for a sophisticated touch.
- Asian Fusion: Incorporate soy sauce and scallions in the filling.
How Different Cultures Incorporate Cheesy Garlic Bombs
- Italy: Similar to garlic knots, often served in pizzerias.
- America: A popular party snack and game day treat.
- France: Appears in bakeries with a gourmet twist.
- Japan: Adapted with local flavors like miso or nori.
Fusion Recipes
- Pizza Bombs: Combine with pizza toppings like pepperoni and marinara sauce inside.
- Taco Bombs: Use seasoned ground beef and cheddar for a taco-inspired treat.
- Buffalo Chicken Bombs: Fill with buffalo chicken and blue cheese for a spicy variation.
Popularity in Global Restaurants
Cheesy Garlic Bombs are featured in:
- Italian Restaurants: As appetizers or side dishes.
- Food Trucks: A trendy street food item.
- Pubs and Bars: Served with a variety of dipping sauces.
- Bakeries: Gourmet versions with unique fillings.
8. Conclusion
Recap of Key Points
Cheesy Garlic Bombs are an irresistible treat that combines the savory flavors of garlic, butter, and cheese wrapped in a soft, golden dough. They’re easy to make, customizable, and perfect for any occasion.
Encouragement to Try the Recipe
Don’t be intimidated by the steps involved. With a bit of practice, you’ll be making Cheesy Garlic Bombs like a pro. They’re worth every minute spent in the kitchen.
Final Thoughts and Personal Anecdotes
One of my fondest memories is making Cheesy Garlic Bombs for a family gathering. The joy on everyone’s faces as they bit into the warm, cheesy centers was priceless. These little bombs of flavor are more than just food; they’re a way to bring people together.
Invitation for Reader Feedback
I hope you enjoy making and eating Cheesy Garlic Bombs as much as I do. I’d love to hear your experiences and any variations you come up with. Feel free to leave comments and share your tips.
9. FAQs
How can I make gluten-free Cheesy Garlic Bombs?
To make gluten-free Cheesy Garlic Bombs, use gluten-free flour to make the dough or buy a pre-made gluten-free dough. Ensure all other ingredients, like cheese and butter, are gluten-free. Follow the same recipe steps for a delicious gluten-free version.
Can I prepare Cheesy Garlic Bombs ahead of time?
Yes, you can prepare Cheesy Garlic Bombs ahead of time. Assemble the bombs and place them on a baking sheet. Cover with plastic wrap and refrigerate for up to 24 hours. When ready to bake, brush with garlic butter and bake as directed.
What type of cheese works best for Cheesy Garlic Bombs?
Mozzarella is the best cheese for Cheesy Garlic Bombs because of its excellent melting properties. However, you can also use cheddar, provolone, or a blend of cheeses to add more flavor.
How do I store leftovers?
Store leftovers in an airtight container in the refrigerator for up to 3 days. To reheat, place the bombs in a preheated oven at 350°F (175°C) for 5-7 minutes. Avoid microwaving as it can make the dough chewy.
Are there vegan options for Cheesy Garlic Bombs?
Yes, you can make vegan Cheesy Garlic Bombs. Use vegan cheese, plant-based butter, and ensure your dough recipe is free from animal products. The rest of the process remains the same.
What are some good dipping sauces for Cheesy Garlic Bombs?
Good dipping sauces include marinara, ranch, garlic aioli, and pesto. These sauces complement the garlic and cheese flavors well, enhancing the overall taste experience.
How do I prevent the cheese from leaking out?
To prevent cheese from leaking, make sure to seal the dough tightly around the cheese. Use small chunks of cheese and center them in the dough. Pinch the edges firmly to ensure they stay closed during baking.
Can I use pre-made dough?
Yes, pre-made dough is a convenient option. You can use pizza dough or biscuit dough from the store. Let it come to room temperature before using, and follow the same recipe steps.
What are the best herbs to use?
Parsley is the most common herb, but you can also use basil, thyme, rosemary, or a mix of your favorite herbs. Fresh herbs add a vibrant flavor and color to the garlic butter.
How can I make them spicier?
To make Cheesy Garlic Bombs spicier, add red pepper flakes to the garlic butter or incorporate diced jalapeños into the cheese filling. You can also serve them with a spicy dipping sauce like sriracha or spicy marinara.