Easy Cherry Cheesecake Cupcakes: A Bite-Sized Dessert Dream
There’s something magical about a dessert that captures the essence of a classic but fits right in the palm of your hand. These Cherry Cheesecake Cupcakes came into my life during a hectic holiday season. I was desperate for a shareable treat that felt special but wouldn’t keep me chained to the kitchen. The moment I pulled the first batch from the oven, the scent of buttery graham cracker and sweet cream cheese filled the air. Topped with those glossy, crimson cherries, they looked like a dozen tiny celebrations. That first bite confirmed it: all the rich, creamy indulgence of a full-sized cheesecake, with none of the fussy slicing. It was an instant classic, and it’s been my secret weapon for potlucks, birthdays, and “I need something sweet” afternoons ever since.
Why You’ll Love This Recipe
Effortless Elegance: They deliver the impressive look and taste of a gourmet dessert with straightforward, no-stress steps.
Perfect Portioning: No slicing required! Each guest gets their own perfectly composed mini cheesecake.
Make-Ahead Marvel: These cupcakes actually get better after chilling, making them the ultimate do-ahead dessert for entertaining.
Crowd-Pleasing Comfort: The familiar, beloved combination of tangy cheesecake, buttery crust, and sweet cherry topping is a guaranteed hit with every age group.
I once brought these to a family barbecue, fully expecting the chocolate desserts to steal the show. My notoriously picky nephew, who usually regards any fruit near his sweets with deep suspicion, eyed them warily. After some coaxing, he took a bite. Then, silently, he reached for another. His mom looked at me, amazed. “He never eats cherries,” she whispered. The magic, I think, is in the harmony—the cherries are sweet and friendly, not tart or challenging, nestled on that cloud of creamy filling. It was a quiet, cherry-stained victory.
What Makes It Special
The Graham Cracker Crust: A golden, crisp, and sweet foundation that provides the essential textural contrast to the creamy filling.
Room Temperature Cream Cheese: This non-negotiable step ensures a luxuriously smooth, lump-free filling that bakes evenly.
Pure Vanilla & Lemon Juice: These aren’t just flavorings; the vanilla adds warm depth, while the subtle touch of lemon brightens the rich cream cheese, keeping it from feeling too heavy.
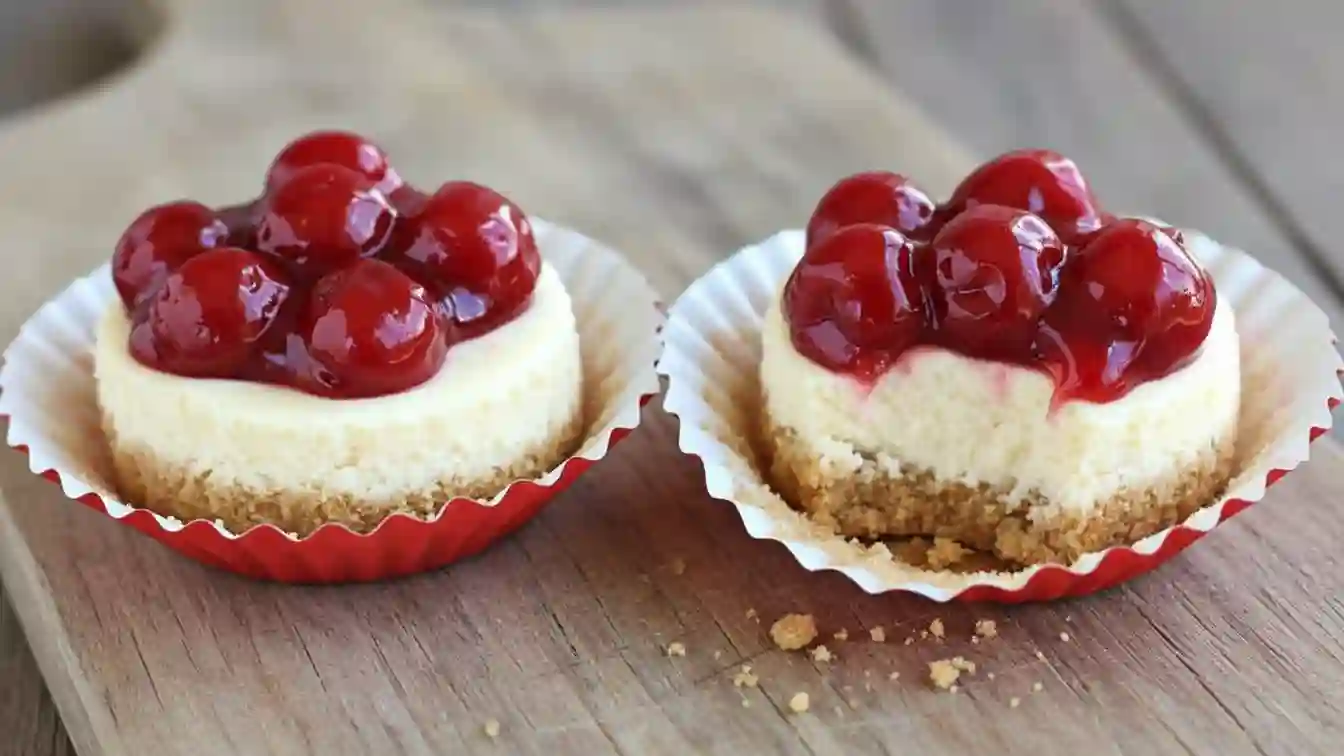
Quality Cherry Pie Filling: The vibrant, glossy topping adds a burst of juicy sweetness and makes each cupcake visually irresistible.
Making It Happen
Start by preheating your oven and lining your muffin tin. The journey begins with the crust. In a bowl, combine the graham cracker crumbs, melted butter, and sugar until the mixture resembles wet sand. It should hold together when pressed. Divide this evenly among your liners and use a small glass or your fingers to press it firmly into a compact, even layer. A firm press here is the secret to a crust that holds its shape. Par-bake this base for just 5 minutes until it’s set and fragrant, then let it cool completely. This short bake prevents a soggy bottom.
For the heart of the cupcake, beat the room-temperature cream cheese in a bowl until it’s utterly smooth and fluffy. This is where patience pays off. Beat in the sugar until the mixture is silky. In a separate bowl, lightly whisk your eggs—this helps them incorporate more evenly. Using a silicone spatula, gently fold the eggs into the cream cheese mixture. The goal is to avoid incorporating too much air, which can lead to cracking. Finally, fold in the vanilla and lemon juice just until the batter is homogenous and creamy.
Carefully spoon this luscious filling over your cooled crusts, filling each cup about two-thirds of the way. They will puff gently as they bake. After a brief 15 minutes in the oven, the centers should still have a slight jiggle—they will set as they chill. The final touch is a generous spoonful of glistening cherry pie filling over each warm cupcake. As they cool to room temperature and then firm up in the refrigerator, the flavors marry into something truly wonderful.
You Must Know
Room temperature is crucial. Cold cream cheese will leave you with a lumpy batter. Take it out at least an hour ahead.
Fold, don’t beat, the eggs. Overmixing incorporates air and can cause the cheesecakes to rise and fall dramatically, leading to cracks.
Let the crust cool completely before adding the filling. A hot crust will start cooking the filling on contact.
The jiggle test is your friend. The centers should still move slightly when you gently shake the pan; they firm up while chilling.
Chilling is not optional. For the best texture and clean slicing, let them chill for at least 3-4 hours, though overnight is ideal.
Serving Ideas
These cupcakes are a complete star on their own. For a beautiful presentation, arrange them on a tiered stand. They pair wonderfully with a cup of strong black coffee to cut through the richness, or a glass of cold milk for ultimate nostalgia. For a grown-up gathering, a sweet dessert wine like a Moscato or a late-harvest Riesling complements the cherry topping beautifully.
Make It Different
Flavor Twist: Swap the cherry pie filling for blueberry, apple, or strawberry. A drizzle of salted caramel or chocolate ganache is also divine.
Citrus Zing: Add a teaspoon of lemon or orange zest to the filling for a brighter flavor profile.
Chocolate Lover’s: Replace the graham crackers with chocolate wafer or Oreo crumbs (filling removed) for the crust.
Nutty Crunch: Add a few tablespoons of finely chopped toasted pecans or almonds to the crust mixture.
Dietary Swap: Use your favorite gluten-free graham-style crackers for the crumbs to make this gluten-friendly.
Storage and Reheating
Store cooled cupcakes in a single layer in an airtight container in the refrigerator for up to 4 days. For longer storage, they freeze exceptionally well. Freeze them solid on a baking sheet first, then transfer to a freezer-safe container or bag for up to 2 months. Thaw overnight in the refrigerator. They do not need to be reheated and are best enjoyed cold. As the recipe note says, they even taste delicious straight from the freezer for a frozen treat.
Success Tips
For the cleanest removal, use high-quality parchment or foil liners, which peel away more easily than standard paper ones. If you see small cracks forming on top as they cool, don’t worry—the generous cherry topping will hide them completely. For a super-polished look, you can add the cherry topping just before serving instead of right after baking.
Frequently Asked Questions
Can I make these without a hand mixer?
Yes, but it will require some elbow grease. A sturdy whisk and some determination can get your room-temperature cream cheese smooth, but a mixer is much easier.
My filling cracked. What did I do wrong?
Cracking is usually caused by overmixing the batter (which adds too much air) or overbaking. Ensure you are folding in the eggs gently and remove the cupcakes from the oven while the center is still slightly jiggly.
Can I use fresh cherries instead of pie filling?
Pie filling provides the perfect thick, syrupy texture. Using fresh cherries would require cooking them down with sugar and a thickener (like cornstarch) to achieve a similar consistency for topping.
How far in advance can I make these?
They are the perfect make-ahead dessert! You can prepare them fully 1-2 days before serving. The flavor improves as it chills.
Can I use a different size pan?
This recipe is specifically designed for a standard 12-cup muffin tin. Using a mini muffin tin would require a significant reduction in baking time, and a jumbo tin would require more time and may crack more easily.
Recipe Card: Cherry Cheesecake Cupcakes
Prep Time: 25 minutes
Cook Time: 20 minutes
Total Time: 45 minutes (plus chilling)
Servings: 12 cupcakes
Category: Dessert
Difficulty: Easy
Cuisine: American
Yield: 12 standard cupcakes
Ingredients
Crust
1.5 cups graham cracker crumbs
1/2 cup butter, melted
1/4 cup granulated sugar
Filling
16 oz. (two 8-oz blocks) cream cheese, at room temperature
1/4 cup granulated sugar
2 large eggs, at room temperature
1 Tablespoon fresh lemon juice
2 teaspoons pure vanilla extract
21 oz. can premium cherry pie filling
Instructions
Preheat oven to 350°F (175°C). Line a standard 12-cup muffin tin with cupcake liners.
In a medium bowl, mix graham cracker crumbs, melted butter, and sugar until combined. Divide mixture evenly among liners (about 2 tablespoons each) and press down firmly with the bottom of a glass or spoon to form a compact crust. Bake for 5 minutes. Remove and let cool completely in the tin.
In a large bowl using a hand mixer, beat the room-temperature cream cheese on medium speed until completely smooth and fluffy, about 2 minutes. Beat in sugar until combined.
In a small bowl, lightly whisk the eggs. Using a silicone spatula, gently fold the whisked eggs into the cream cheese mixture until just combined. Fold in the lemon juice and vanilla extract. Do not overmix.
Divide the filling evenly over the cooled crusts, filling each cup about 2/3 full. Bake for 15-18 minutes, until the edges are set but the center still has a slight jiggle.
Remove from oven and immediately spoon cherry pie filling over the top of each warm cupcake. Allow to cool completely at room temperature, then transfer to the refrigerator to chill for at least 4 hours, or overnight, until fully set.
Nutrition Information (per cupcake, estimated): Calories: 320 | Fat: 22g | Saturated Fat: 13g | Carbohydrates: 26g | Sugar: 18g | Protein: 5g