The Best 20-Minute Crescent Cheese Danishes Recipe
There is a specific kind of magic that happens in a kitchen on a slow Saturday morning when the scent of melting butter and toasted sugar begins to drift through the house. You know that smell—the one that pulls people out of bed without a single word being spoken. These Crescent Cheese Danishes are the reason those mornings feel so special.
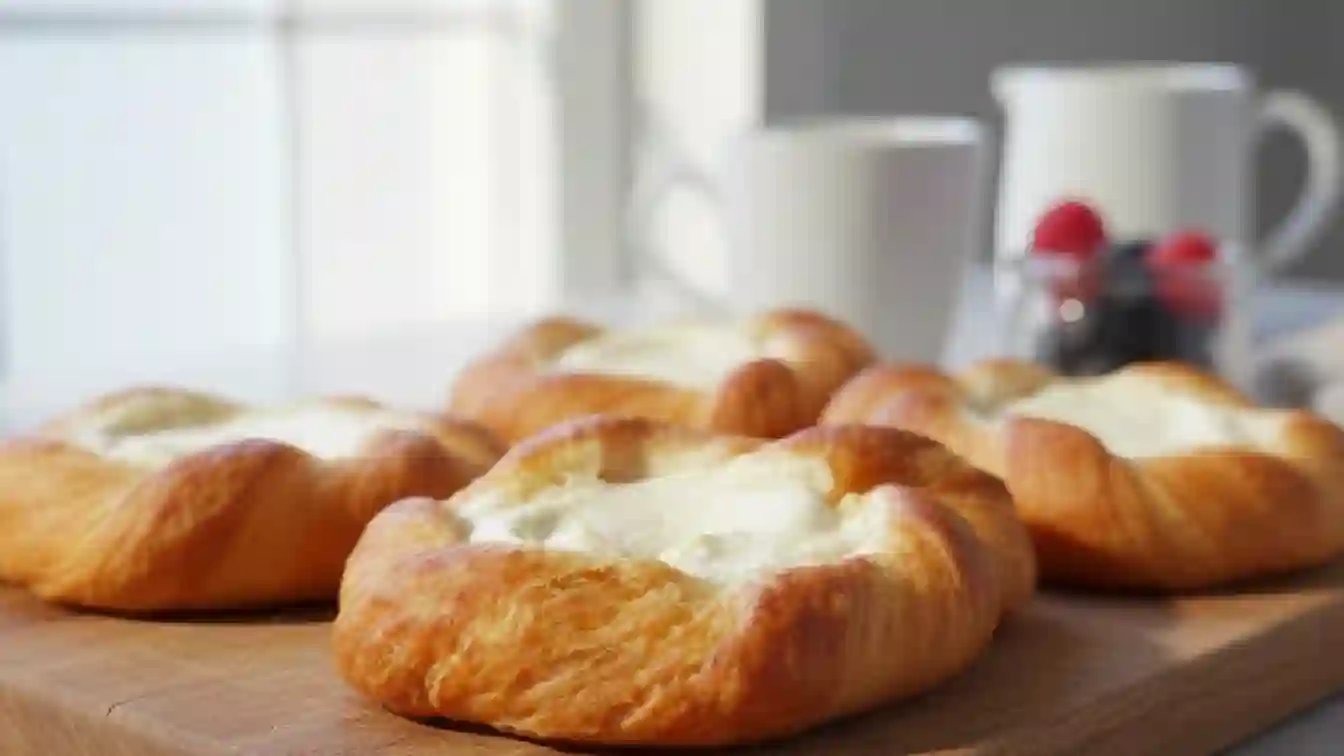
I remember the first time I pulled a tray of these out of the oven. I wanted something that tasted like it came from a high-end corner bakery but didn’t require me to spend four hours proofing dough or laminating butter. The result was a pastry that is impossibly flaky on the outside with a center so creamy and bright it almost melts on your tongue. It’s a shortcut that doesn’t taste like one, proving that sometimes the simplest methods yield the most sophisticated results.
Why You’ll Love This
Bakery Quality at Home: You get those professional-looking golden rings and a rich, velvety center without needing a culinary degree.
Minimal Effort, Maximum Reward: Using crescent roll dough as a base means you can go from “I’m hungry” to “first bite” in under thirty minutes.
The Perfect Balance: The tang of the lemon juice cuts through the richness of the Philly cream cheese, making these sweet but never cloying.
Pantry-Friendly: Aside from the cream cheese, you likely have every single one of these ingredients sitting in your kitchen right now.
The Ultimate Picky Eater Test
I have a cousin who is notoriously difficult to feed. He claims he doesn’t like “sweet breakfasts” and usually sticks to plain toast. The last time he visited, I left a tray of these Crescent Cheese Danishes on the counter while I went to pour more coffee. By the time I walked back into the room, two were gone, and he was hovering over a third with a look of genuine confusion and joy. He couldn’t believe the base was a simple tube of store-bought dough. It’s now the only thing he asks for when he comes over, proving that even the most stubborn palates can’t resist a warm, buttery pastry.
What Makes It Special
Philly Cream Cheese: This is the gold standard for a reason. It provides a dense, silky texture that holds up beautifully during the bake.
Pure Vanilla Extract: Using the real stuff instead of imitation makes a massive difference in the depth of flavor in both the filling and the glaze.
Brown Sugar Butter Wash: Brushing the dough with a mixture of melted butter and light brown sugar creates a caramelized, “crackly” crust that elevates the store-bought dough.
A Hint of Lemon: That single teaspoon of lemon juice acts as a brightener, making the cream cheese filling taste fresh and homemade.
Making It Happen
To begin your Crescent Cheese Danishes Recipe, start by preheating your oven to 350°F. While that’s warming up, grab a medium bowl and your hand mixer. You’ll want to beat the softened cream cheese, white sugar, vanilla, and lemon juice together. Keep going until it looks like a cloud—smooth, glossy, and completely free of lumps. Set that aside for a moment.
Now for the “secret” technique: open your crescent roll tubes but resist the urge to unroll them. Keep that dough in its cylindrical log shape. Using a sharp serrated knife, slice the log into thick rounds. Lay these rounds onto a baking sheet lined with parchment paper. Take a small measuring cup or just use your thumb to press down the center of each round, pushing the dough outward to create a little “wall” or nest. This is what will hold your creamy treasure.
In a small bowl, whisk together your melted butter and brown sugar. Generously brush this over the dough rings; this is how we get that gorgeous golden color. Spoon a healthy dollop of the cream cheese mixture into the center of each nest. Slide them into the oven for about 16 to 18 minutes. You’re looking for the edges to turn a soft, golden brown and the cheese to look set. Once they’re out, let them cool just enough so the glaze doesn’t immediately disappear, then drizzle it on thick.
You Must Know
Room Temp is Key: Ensure your cream cheese is truly softened. If it’s cold, the filling will be grainy rather than silky.
Don’t Overwork the Dough: Handle the crescent rolls as little as possible to keep those buttery layers from compressing.
The “Well” Technique: When pressing the center of the dough, make sure you leave a sturdy bottom so the filling doesn’t leak through.
Sharp Knife Only: Use a very sharp knife to slice the dough log so you don’t “squish” the layers together.
Serving Ideas
These danishes are the star of any brunch spread. I love serving them alongside a sharp, acidic fruit salad—think fresh grapefruit segments or sliced strawberries—to balance the richness of the cheese.
For drinks, a strong dark roast coffee or a cold brew is the natural partner here. If you’re serving these for a special occasion, a dry Prosecco or a Mimosa with an extra splash of orange juice complements the buttery pastry perfectly.
Make It Different
Fruit Topped: Add a spoonful of strawberry, blueberry, or cherry pie filling on top of the cream cheese before baking.
Almond Twist: Swap the vanilla extract for a half-teaspoon of almond extract for a sophisticated, nutty flavor profile.
Citrus Zest: Grate some fresh orange or lemon zest into the cream cheese filling for an extra punch of brightness.
Savory-Sweet: Sprinkle a tiny pinch of flaky sea salt over the glaze to make the sugar flavors pop.
Storage and Reheating
If you have leftovers (which is rare!), store them in an airtight container in the refrigerator for up to 3 days. Because of the dairy content in the cream cheese, they shouldn’t sit on the counter for more than a few hours.
To reheat, avoid the microwave if you can—it makes the pastry soft. Instead, pop them back into a 350°F oven or air fryer for 3–5 minutes. This will crisp the edges back up and make the center gooey again.
Success Tips
Parchment Paper is Non-Negotiable: The brown sugar and butter wash can get sticky; parchment ensures they lift right off the tray without breaking.
The Glaze Drizzle: Wait at least 5 minutes after pulling them out of the oven before glazing. If the pastry is too hot, the glaze will melt into a transparent liquid rather than staying white and pretty.
Check the Bottoms: Use a spatula to peek at the bottom of one danish around the 15-minute mark. If it’s golden, they are nearly done.
FAQ
Can I make these ahead of time?
You can prep the cream cheese filling a day in advance. However, I recommend slicing and baking the dough right before serving for the best texture.
Can I use low-fat cream cheese?
You can, but the filling may be slightly runnier and won’t have that same iconic “Philly” richness. For the best results, stick with full-fat.
My dough log is too soft to slice, what do I do?
If the dough got too warm on the counter, pop the unopened tubes into the freezer for 5-10 minutes. This firms up the butter and makes slicing much easier.
How do I keep the filling from overflowing?
Make sure your “wall” of dough is at least a quarter-inch high. Don’t overfill—about one tablespoon of filling per danish is usually perfect.
Can I freeze these?
Yes! Bake them fully, let them cool (without the glaze), and freeze in a single layer. When ready to eat, bake from frozen at 350°F until warm, then add the glaze.
Recipe Card
| Item | Details |
| Prep Time | 10 Minutes |
| Cook Time | 18 Minutes |
| Total Time | 28 Minutes |
| Servings | 12 – 16 Danishes |
| Category | Breakfast / Pastry |
| Difficulty | Easy |
| Cuisine | American |
| Yield | 2 Cookie Sheets |
Equipment
Medium mixing bowl
Hand mixer or stand mixer
Small bowl for butter mixture
Pastry brush
Baking sheet
Parchment paper
Serrated knife
Ingredients
Main Pastry
2 Crescent Roll Tubes (standard size)
1 package (8 oz) Philly cream cheese, softened
2 TB butter, fully melted
1 tsp lemon juice
1/4 Cup light brown sugar
1/2 Cup regular white sugar
1 Teaspoon pure vanilla extract
Glaze
1/2 Cup powdered sugar
1 Teaspoon pure vanilla extract
4 Teaspoons milk
Instructions
Preheat & Prep: Preheat your oven to 350°F and line two cookie sheets with parchment paper.
Mix the Filling: In a medium bowl, use a mixer to combine the softened cream cheese, lemon juice, 1 tsp vanilla extract, and white sugar. Beat until the mixture is smooth and well combined.
Slice the Dough: Open the crescent roll tubes but do not unroll the dough. Using a sharp knife, cut the dough logs into thick slices (roughly 1 inch thick).
Form the Nests: Lay each slice flat on the parchment-lined sheet. Use your fingers or the bottom of a small measuring cup to press down the center, creating a small wall around the edge to hold the filling.
Butter Wash: In a small bowl, stir the melted butter and brown sugar together. Use a pastry brush to coat the dough portion of each danish generously.
Fill: Dollop even amounts of the cream cheese filling into the center of each prepared dough ring.
Bake: Place in the oven and bake for 16-18 minutes, or until the pastry is golden brown and the cheese is set.
Glaze & Finish: Let the danishes cool for a few minutes. While cooling, whisk the glaze ingredients (powdered sugar, vanilla, and milk) until smooth. Drizzle over the warm danishes.
Notes
For a gourmet look, top each danish with a teaspoon of cherry, strawberry, or blueberry pie filling before or after baking.
Make sure the butter is melted but not boiling hot when you mix it with the brown sugar, or it may start to dissolve the sugar too quickly.
Nutrition (Estimated per Danish)
Calories: 210 kcal
Fat: 12g
Carbohydrates: 24g
Protein: 3g
Sugar: 14g