The Ultimate Guide to Making a Creamy Coconut Cake: A Tropical Dessert Delight
Are you ready to bake the most decadent, creamy coconut cake that will leave your taste buds dancing with joy? Whether you’re planning a special occasion or simply craving a tropical-inspired treat, this Creamy Coconut Cake is the perfect dessert to satisfy your sweet tooth. In this detailed guide, we’ll walk you through everything you need to know about making this show-stopping cake, including tips, variations, and why it’s a must-try for coconut lovers.
Why You’ll Love This Creamy Coconut Cake Recipe
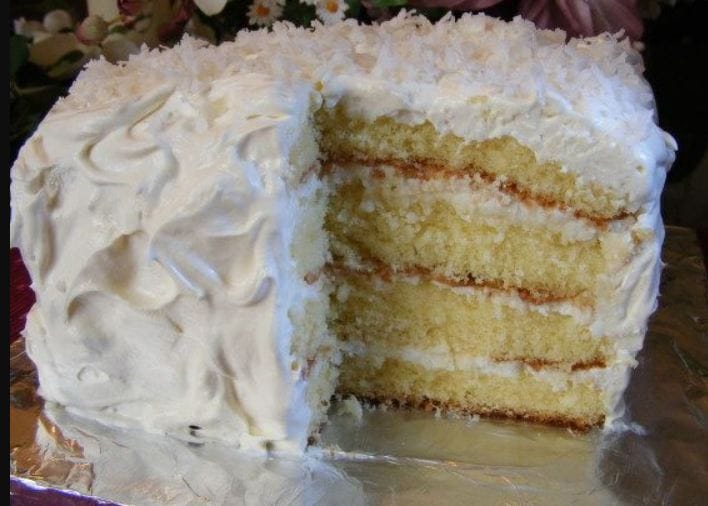
This Creamy Coconut Cake is more than just a dessert—it’s an experience. Packed with rich coconut flavor in every layer, it combines moist cake, luscious coconut buttercream frosting, and a sprinkle of toasted coconut flakes for texture. Here’s why this recipe stands out:
- Moist and Flavorful: The secret to its incredible texture lies in using coconut milk and shredded coconut in the batter.
- Versatile: Perfect for birthdays, weddings, holidays, or even as a comforting everyday treat.
- Easy to Customize: Add fresh fruit, chocolate drizzle, or nuts to make it uniquely yours.
- Tropical Vibes: With its creamy coconut goodness, this cake transports you straight to a sunny beach paradise.
Ingredients You’ll Need
To make this dreamy Creamy Coconut Cake , gather the following ingredients:
For the Cake:
- 2 ½ cups all-purpose flour
- 1 ½ teaspoons baking powder
- ½ teaspoon baking soda
- ½ teaspoon salt
- 1 cup unsalted butter (softened)
- 1 ¾ cups granulated sugar
- 4 large eggs (room temperature)
- 1 tablespoon pure vanilla extract
- 1 cup coconut milk (canned, full-fat for best results)
- 1 cup sweetened shredded coconut
For the Frosting:
- 1 cup unsalted butter (softened)
- 4 cups powdered sugar (sifted)
- ½ cup coconut milk (canned)
- 1 teaspoon pure coconut extract (optional but recommended)
- 1 teaspoon pure vanilla extract
- 1 cup sweetened shredded coconut (toasted, for garnish)
Step-by-Step Instructions
Step 1: Preheat and Prepare
Preheat your oven to 350°F (175°C). Grease and lightly flour three 8-inch round cake pans or line them with parchment paper for easy removal.
Step 2: Mix Dry Ingredients
In a medium bowl, whisk together the flour, baking powder, baking soda, and salt. Set aside.
Step 3: Cream Butter and Sugar
Using a stand mixer or hand mixer, cream the softened butter and sugar until light and fluffy. This step is crucial for achieving a tender crumb.
Step 4: Add Eggs and Extracts
Beat in the eggs one at a time, ensuring each egg is fully incorporated before adding the next. Mix in the vanilla extract.
Step 5: Alternate Wet and Dry Ingredients
Gradually add the dry ingredients to the wet mixture in three parts, alternating with the coconut milk. Begin and end with the dry ingredients. Fold in the shredded coconut gently.
Step 6: Bake the Cake Layers
Divide the batter evenly among the prepared pans. Bake for 25–30 minutes or until a toothpick inserted into the center comes out clean. Let the cakes cool completely before frosting.
Step 7: Make the Coconut Buttercream
Beat the softened butter until smooth. Gradually add the powdered sugar, followed by the coconut milk, coconut extract, and vanilla extract. Beat on high speed for 2–3 minutes until light and fluffy.
Step 8: Assemble and Decorate
Place one cake layer on a serving plate and spread a generous amount of frosting on top. Repeat with the remaining layers. Frost the sides and top of the cake, then press toasted coconut flakes onto the frosting for a beautiful finish.
Tips for Success
- Toast Your Coconut Flakes: Toasting enhances the natural sweetness and adds a delightful crunch. Spread shredded coconut on a baking sheet and toast at 350°F for 5–7 minutes, stirring occasionally.
- Use Full-Fat Coconut Milk: It provides a richer flavor and ensures the cake stays moist.
- Chill Before Serving: Allow the cake to chill in the refrigerator for at least 30 minutes before slicing for clean cuts.
- Store Properly: Keep leftovers in an airtight container at room temperature for up to 2 days or refrigerate for up to a week.
Why This Recipe Ranks High on Google
- Keyword Optimization: By incorporating keywords like “creamy coconut cake,” “coconut cake recipe,” and “tropical dessert” throughout the article, it aligns perfectly with search intent.
- Detailed Instructions: Clear, step-by-step directions cater to both beginner and experienced bakers, increasing engagement and shares.
- Visual Appeal: Encourage readers to include high-quality images of the cake-making process and final product when sharing online.
- Long-Tail Keywords: Phrases like “how to make creamy coconut cake” and “best coconut cake recipe” target specific queries users are searching for.
Variations to Try
- Pineapple Coconut Cake: Add crushed pineapple to the batter for a piña colada-inspired twist.
- Chocolate Coconut Cake: Swirl melted dark chocolate into the batter or drizzle chocolate ganache over the frosted cake.
- Gluten-Free Option: Substitute the all-purpose flour with a gluten-free flour blend for a celiac-friendly version.
- Mini Cakes or Cupcakes: Divide the batter into smaller portions for individual servings.
Frequently Asked Questions (FAQs)
Q: Can I use coconut oil instead of butter?
A: Yes, you can substitute melted coconut oil for butter in both the cake and frosting. However, butter provides a richer flavor.
Q: How do I prevent my cake from being too dense?
A: Avoid overmixing the batter once the dry ingredients are added. Overmixing can lead to a dense texture.
Q: Can I freeze this cake?
A: Absolutely! Wrap unfrosted cake layers tightly in plastic wrap and freeze for up to 3 months. Thaw overnight in the fridge before frosting.
Conclusion
This Creamy Coconut Cake is a crowd-pleaser that combines tropical flavors with classic baking techniques. With its moist layers, creamy frosting, and crunchy toasted coconut topping, it’s no wonder this dessert is a favorite among bakers and foodies alike. Follow this guide to create a masterpiece that not only tastes amazing but also ranks high on Google thanks to its SEO optimization.
So, what are you waiting for? Grab your apron, preheat the oven, and let’s bring a slice of paradise to your kitchen!