
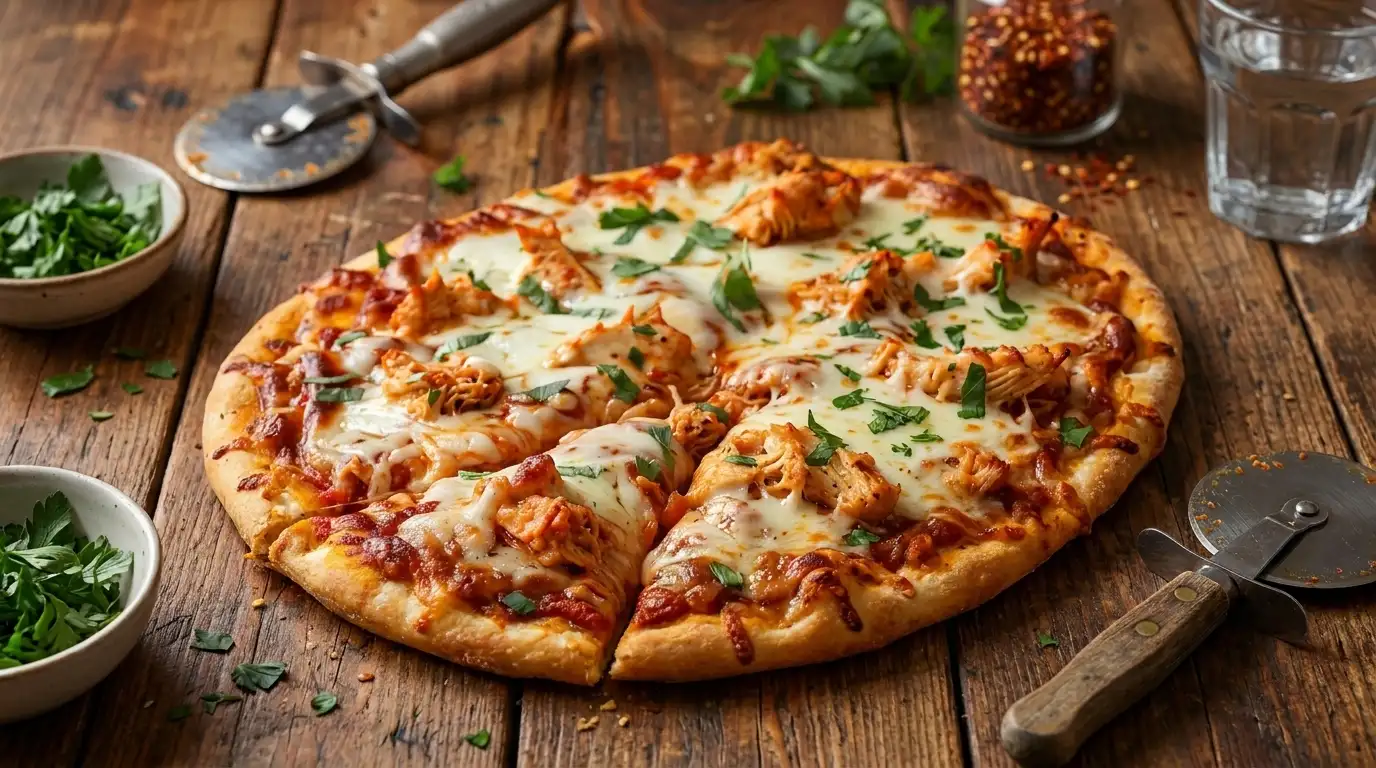
Canned Chicken Pizza Crust: A Game-Changing Low-Carb Dinner Solution
Introduction
There’s a moment in every home cook’s life when you realize that the best kitchen innovations often come from the most unexpected places. A can of chicken, some eggs, a handful of mozzarella, and twenty minutes of oven time later—you’ve got a pizza crust that’s crispy, savory, and nothing like what you thought was possible. This canned chicken pizza crust isn’t just a workaround for those watching their carbs; it’s a genuine discovery that transforms humble pantry staples into something you’ll actually crave. The first time I pulled this from the oven, golden-brown edges curling just slightly, I knew I’d stumbled onto something special. It’s become the kind of recipe that makes people ask, “Wait, that’s just canned chicken?” with genuine surprise in their voice.
Why You’ll Love This
You’ll love this canned chicken pizza crust because:
- It comes together in under 30 minutes from pantry staple to dinner table, perfect for nights when plans fall through
- The texture is surprisingly crispy on the outside while staying tender inside, with none of the dense, rubbery feel of some low-carb crusts
- It’s naturally protein-rich and keeps you satisfied for hours, making it ideal for lunch the next day too
- You likely already have most ingredients at home, cutting down on grocery trips and food waste
- It works beautifully for meal prep, storing well in the fridge and reheating without becoming soggy
The Backstory
My sister-in-law is what you’d politely call a “texture person.” She’s the type who sends back soups that are too chunky and picks toppings off with surgical precision. When I first told her I was making pizza from canned chicken, she gave me that look—the one that says she’s already mentally planned her exit strategy from dinner. I made it anyway, partly stubborn, mostly because I genuinely believed in the recipe. When she took that first bite and actually paused, then went back for another, I knew something real had happened. She asked for the recipe before she’d even finished chewing. Now her kids ask for “the chicken crust pizza” by name, and she’s made it at least a dozen times. That conversion moment, when something unexpected becomes someone’s go-to meal, never gets old.
What Makes It Special
This recipe works because of how each ingredient serves a specific purpose:
- Canned chicken provides moisture, binding power, and a subtle savory depth that acts as the structural foundation
- Eggs create lift and help the mixture set into a sturdy base that can hold toppings without collapsing
- Mozzarella cheese adds fat for richness, helps the crust brown beautifully, and creates pockets of melted goodness throughout
- Almond flour (or similar low-carb flour) adds slight texture without weighing down the crust with traditional carbs
- Italian seasoning, garlic powder, and parmesan work together to build a flavor profile that tastes intentional, not like a substitute
- The combination results in a crust that’s crispy enough to support toppings but tender enough that it’s still pleasant to eat
Making It Happen
Start by draining your canned chicken thoroughly—this step matters more than you’d think, as excess liquid will make your crust soggy. Pat it dry with paper towels if you’re feeling thorough. Preheat your oven to 400°F and line a pizza pan or large baking sheet with parchment paper or silicone.
In a medium bowl, combine the drained chicken with two large eggs, cracking them directly into the mixture and whisking until everything is evenly combined. Add two cups of shredded mozzarella, a quarter cup of almond flour, two teaspoons of Italian seasoning, one teaspoon of garlic powder, and half a teaspoon of salt. The mixture will seem wetter than traditional pizza dough—that’s exactly right. Stir everything together until you have a cohesive, slightly sticky base that holds together when pressed.
Transfer the mixture onto your prepared baking sheet and use your hands or the back of a spoon to press it into a pizza-sized circle about a quarter-inch thick. Don’t worry about perfection here; organic, slightly irregular edges actually brown more beautifully. Sprinkle a bit more parmesan on top if you’d like extra flavor and a more finished appearance.
Bake for fifteen to eighteen minutes until the edges are noticeably golden and crispy, and the top is set and starting to brown lightly. You’ll notice the edges curling up slightly—this is the sweet spot. Remove from the oven, let it cool for just two minutes, then add your toppings. Return to the oven for another five to eight minutes until your cheese is melted and any other toppings are heated through.
You Must Know
- Draining your chicken properly is non-negotiable; wet chicken makes a dense, heavy crust instead of a crispy one
- Don’t skip the parchment paper or silicone mat—this prevents sticking and allows better browning on the bottom
- The mixture should look loose and wet initially; this isn’t a sign something’s wrong, it’s a sign it’s right
- Cook the crust on its own for the first 15-18 minutes before adding toppings to ensure the base sets properly
- If your oven runs hot, check the crust a minute or two early to prevent over-browning
Serving Ideas & Pairings
Serve this crust as you would any pizza—with classic tomato sauce, fresh basil, and mozzarella for a Margherita-style option, or get creative with white sauce, spinach, sun-dried tomatoes, and feta. Pair it with a crisp green salad dressed in lemon vinaigrette to add freshness and cut through the richness. If you’re looking for beverages, a cold ginger ale or sparkling water with lime works nicely, or reach for a dry white wine like Pinot Grigio if you’re enjoying it as a relaxed dinner with friends.
Make It Different
If almond flour isn’t your thing, try coconut flour at a ratio of three tablespoons per quarter cup called for (it absorbs more liquid), or substitute it entirely with finely grated cauliflower or zucchini that’s been squeezed dry. For extra flavor depth, mix in two tablespoons of cream cheese softened into the chicken mixture, which adds richness and helps bind everything together even more effectively.
Change up your protein by using rotisserie chicken that’s been shredded finely, though you’ll want to reduce any excess moisture. If dairy isn’t part of your plan, cashew cream mixed with nutritional yeast provides a similar binding effect and cheesy flavor. For those who enjoy heat, add a quarter teaspoon of cayenne pepper and a tablespoon of finely minced jalapeños to the base mixture before baking.
Storage & Reheating
Store leftover pizza in an airtight container in the refrigerator for up to four days. To reheat, place slices on a baking sheet and warm in a 350°F oven for five to seven minutes, which will restore crispness to the edges while keeping the interior tender. You can also reheat in a skillet over medium heat for about three minutes per side, which creates an almost fried-crust effect that some people prefer.
The crust can be frozen after the initial bake and before topping. Wrap cooled, untopped crust tightly in plastic wrap and then aluminum foil, and freeze for up to three months. Thaw in the refrigerator before adding toppings and finishing bake time.
Success Tips
The temperature of your ingredients matters slightly—if your eggs and chicken are cold from the fridge, let them sit out for five minutes so they combine more smoothly. If you’re making this with someone who’s skeptical about the texture, top it generously enough that the crust itself becomes secondary to what’s on top; this usually converts the skeptics quickly. Consider making a larger batch and freezing the uncooked base in portions so you can have this ready on particularly busy evenings. The first slice will always be the prettiest—have your camera ready if you’re sharing this on social media, or just eat it first so nobody notices the messier slices. Finally, don’t be discouraged if your first attempt isn’t perfect; the second time you make this, you’ll know exactly how your specific oven browns it, and you’ll dial in the timing effortlessly.
Frequently Asked Questions
Can I make this without eggs?
Eggs provide crucial binding and lift, so they’re difficult to replace entirely. However, you can use a flax egg (one tablespoon ground flax mixed with three tablespoons water, rested for 15 minutes) as a substitute, though the crust will be slightly denser and may need an extra minute or two of cooking time.
Why is my crust coming out rubbery?
This almost always points to excess moisture from inadequately drained chicken. Make sure you’re draining the can thoroughly and patting the chicken dry with paper towels before mixing. If the crust still seems wet after mixing, you can add another tablespoon of almond flour to absorb extra liquid.
Is this recipe actually keto-friendly?
Yes, this recipe is generally considered keto-friendly, with approximately 2-3 grams of net carbs per slice depending on your toppings. The almond flour and mozzarella are both low-carb staples. Just verify that your specific toppings fit your macros.
Can I use fresh chicken instead of canned?
Absolutely. Shredded rotisserie chicken works beautifully, though you’ll want to make sure it’s finely shredded and any excess moisture is removed. Use about two cups of cooked, shredded chicken as a substitute for the canned version.
How thick should the crust be?
Aim for about a quarter-inch thick for the best balance of crispy exterior and tender interior. If you prefer it thinner and crispier, press it to about an eighth-inch thick. If you like it thicker and fluffier, aim for just under half an inch, though this may require an extra two to three minutes of baking time.
Recipe Card Info
Prep time: 10 minutes
Cook time: 23 minutes
Total time: 33 minutes
Servings: 4 (one pizza, cut into 4 slices)
Category: Main Course
Difficulty: Easy
Cuisine: American / Low-Carb
Yield: One 12-inch pizza
Equipment: 12-inch pizza pan or large baking sheet, mixing bowl, measuring cups and spoons, paper towels, parchment paper or silicone baking mat
Ingredients
- 2 cans (12.5 oz each) chicken, drained and patted dry
- 2 large eggs
- 2 cups shredded mozzarella cheese
- 1/4 cup almond flour
- 2 teaspoons Italian seasoning
- 1 teaspoon garlic powder
- 1/2 teaspoon salt
- 1/4 teaspoon black pepper
- 2 tablespoons grated parmesan cheese
- Your choice of pizza toppings (sauce, cheese, vegetables, cured meats, etc.)
Directions
Step 1: Preheat your oven to 400°F. Line a 12-inch pizza pan or large baking sheet with parchment paper or a silicone baking mat.
Step 2: Drain the canned chicken thoroughly in a fine-mesh strainer, pressing gently to remove excess liquid. Pat dry with paper towels.
Step 3: In a medium mixing bowl, crack the eggs and whisk them together until the yolks and whites are fully combined.
Step 4: Add the drained chicken, shredded mozzarella, almond flour, Italian seasoning, garlic powder, salt, and black pepper to the bowl with the eggs. Stir everything together until fully combined and no streaks of egg remain.
Step 5: Transfer the mixture to the prepared baking sheet. Using your hands or the back of a spoon, press the mixture into a pizza-sized circle about a quarter-inch thick. The edges don’t need to be perfectly smooth.
Step 6: Sprinkle the grated parmesan cheese evenly over the top of the crust.
Step 7: Bake for 15 to 18 minutes, until the edges are golden brown and the top is set and beginning to brown lightly. The crust should feel firm when you gently press the center.
Step 8: Remove from the oven and let cool for 2 minutes. Add your desired pizza toppings, distributing them evenly across the surface.
Step 9: Return to the oven and bake for an additional 5 to 8 minutes, until the cheese is melted and any other toppings are heated through.
Step 10: Remove from the oven and allow to cool for 2 to 3 minutes before slicing and serving.
Notes
This crust can be made ahead of time. Bake the base crust completely, let it cool, wrap it tightly in plastic wrap and aluminum foil, and refrigerate for up to 3 days or freeze for up to 3 months. Thaw in the refrigerator before topping and finishing.
For extra flavor, you can mix 2 tablespoons of softened cream cheese into the base mixture before pressing onto the baking sheet.
If you prefer a crispier crust, use a perforated pizza pan or pizza stone (preheated) instead of a regular baking sheet, which allows air to circulate underneath.
The mixture may seem wetter than traditional pizza dough—this is correct. Don’t add extra flour or the crust will become dense.
Nutrition
Per slice (based on crust only, without toppings):
Calories: 320
Total Fat: 22g
Saturated Fat: 11g
Cholesterol: 95mg
Sodium: 780mg
Total Carbohydrates: 3g
Dietary Fiber: 1g
Net Carbs: 2g
Protein: 28g
(Nutritional values are approximate and may vary based on specific ingredient brands and preparation methods.)
