Blooming Quesadilla Ring Recipe: The Ultimate Party Appetizer
There’s something magical about food that’s meant to be shared, a dish that lands on the table and makes everyone stop and stare. That’s the spell this Blooming Quesadilla Ring casts. I first made it for a chaotic, wonderful family game night, hoping to create a centerpiece that was as fun to eat as it was to look at. The moment I pulled this golden, cheesy, crispy ring from the oven, the conversation halted. Then came the chorus of “wows.” It wasn’t just a quesadilla anymore; it was an experience, a conversation starter, and the undeniable star of the snack table.
Why You’ll Love This
The Ultimate Crowd-Pleaser: This isn’t just food; it’s an event. Its stunning presentation guarantees it will be the first thing to disappear at any gathering.
Surprisingly Simple Magic: While it looks impressively intricate, the process is straightforward and forgiving. It’s about assembly, not advanced culinary skill.
Total Customization: The fillings are a blank canvas. Swap the chicken for beef, beans, or just more veggies to make it your own.
Fun for Everyone: There’s a primal joy in pulling apart a cheesy, crispy cone and dunking it into a cool, creamy dip. It’s interactive, hands-on, and utterly delightful.
I’ll never forget serving this to my friend’s son, a legendary picky eater whose diet seemed to consist solely of plain pasta and air. He eyed the ring with suspicion, but the allure of the golden, cheesy cones was too strong. He tentatively pulled one free, dipped it in the accompanying sour cream, and took a bite. His eyes went wide. “This is the best thing ever,” he declared, immediately going back for a second. His mother looked at me as if I had performed a miracle.
What Makes It Special
The Dynamic Cheese Duo: A blend of sharp, melty cheddar and creamy, mild Monterey Jack creates a perfect cheese pull and a complex, rich flavor that isn’t greasy.
Flavor-Packed Filling: Using a robust taco sauce as the base, rather than plain salsa or seasoning, means every bite of the tender shredded chicken and crisp vegetables is deeply seasoned from the inside out.
Textural Triumph: The baking process transforms the soft tortillas into a beautiful contrast of crispy, golden edges and soft, steamy, cheesy interiors.
Making It Happen
Start by preheating your oven to 375˚F (190˚C) and lining a baking sheet with parchment paper—this is your insurance policy for a clean release. In a large bowl, you’ll combine the juicy shredded chicken, finely chopped onion, vibrant red bell pepper, and a bit of spicy jalapeño. Pour in that flavorful taco sauce and mix everything until it’s beautifully coated and glistening.
Now, take your taco-size tortillas and slice each one in half. On each half, sprinkle a generous foundation of your cheddar and Monterey Jack cheese blend. This initial cheese layer acts as a delicious glue. Then, spoon on about a tablespoon of your chicken mixture. Here’s the fun part: starting from the cut edge, gently but firmly roll each half into a tight cone, being careful not to squeeze the filling out the sides.
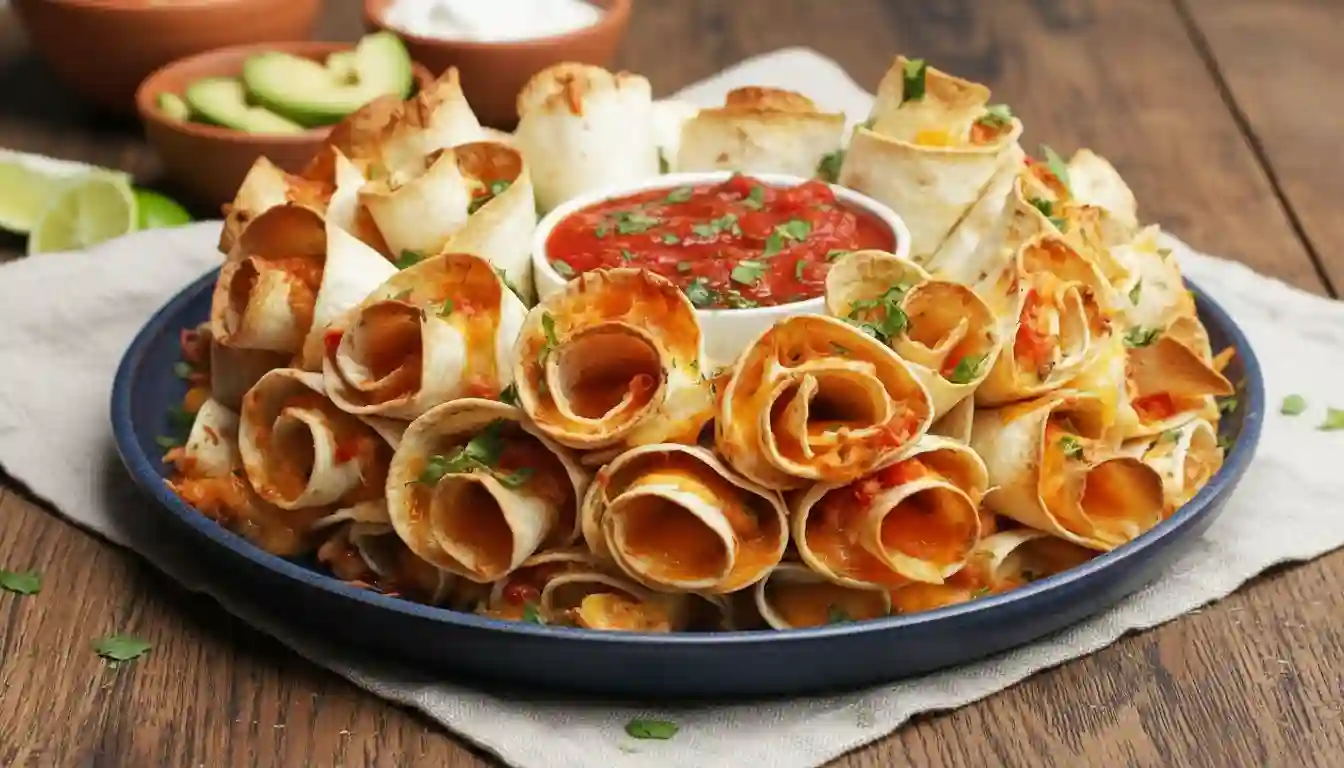
Place a sturdy glass or jar right in the center of your prepared baking sheet. Arrange about 13 of your tortilla cones in a ring around it, with the pointed tips snug against the glass. This forms your sturdy base layer. Sprinkle a handful of cheese over this first layer—this will help fuse everything together. Repeat the process, building a second and then a third layer with the remaining cones, finishing with a glorious, generous blanket of the remaining cheese. Gently remove the glass from the center; you’ll now see the beautiful sunburst pattern.
Slide the pan into the hot oven and bake for 15-20 minutes. You’re waiting for that perfect moment: the cheese is utterly molten and bubbly, and the tortilla edges are a deep, crispy golden brown. Carefully transfer the entire blooming quesadilla ring to a serving platter. Fill the center cavity with your favorite dip—a cool, creamy cilantro-lime crema or a simple bowl of guacamole works perfectly. Serve it immediately and watch the magic happen.
You Must Know
Don’t Overfill: It’s tempting to pack the tortillas, but overfilling makes them difficult to roll and more likely to burst open during baking.
Pack Them Tightly: When building your ring, place the cones close together. They will shrink slightly as they bake, and a tight pack ensures a beautiful, full ring.
Let it Rest: For the cleanest pull, let the ring rest for 2-3 minutes after baking. This allows the molten cheese to set just slightly.
Warm Tortillas are Flexible: If your tortillas are cracking when you roll them, warm them for 15-20 seconds in the microwave under a damp paper towel.
Serving Ideas
This blooming quesadilla ring is a meal in itself, but it shines as the centerpiece of a casual spread. Pair it with a bright, chunky pico de gallo, a smooth and rich black bean dip, and a simple side salad with a zesty lime vinaigrette to cut through the richness. For drinks, a crisp Mexican lager, a tangy margarita, or an agua fresca are all perfect companions.
Make It Different
Protein Swap: Use seasoned ground beef, shredded barbacoa, black beans, or sautéed mushrooms instead of chicken.
Spice Level: Control the heat by removing the jalapeño seeds for a milder version or adding a diced serrano pepper for more fire.
Cheese Choices: A pepper jack cheese would add a lovely kick, or a smoked gouda would introduce a wonderful smoky depth.
Low-Carb/Gluten-Free: Use your favorite low-carb or gluten-free tortillas for a dietary-friendly version that works just as beautifully.
Storage and Reheating
Store any leftover blooms in an airtight container in the refrigerator for up to 3 days. The best way to reheat and recapture the crispness is in an air fryer or toaster oven at 375˚F for 3-5 minutes. The microwave will work in a pinch but will result in a softer texture.
Success Tips
For the most visually stunning ring, use a mix of yellow and white cheddar cheeses to create a more dynamic color. If you find your cones unrolling as you build the ring, place a small dollop of the filling mixture on the outer flap to act as an edible adhesive to seal it shut.
Frequently Asked Questions (FAQ)
Can I assemble the Blooming Quesadilla Ring ahead of time?
Absolutely. You can assemble the entire ring on the baking sheet, cover it tightly with plastic wrap, and refrigerate it for up to 8 hours before baking. You may need to add 2-3 extra minutes to the baking time since it will be going into the oven cold.
My tortillas keep cracking when I try to roll them. What did I do wrong?
This almost always means your tortillas are too cold. Tortillas are most pliable when warm. Simply microwave the stack for 20-30 seconds under a damp paper towel to make them soft and flexible.
Can I use flour tortillas instead of corn?
This recipe is designed for soft taco-size flour tortillas, as they are pliable and easy to roll. Corn tortillas are more likely to crack and are not recommended for this specific recipe.
What’s the best dip to serve in the center?
You can’t go wrong with a cool and creamy dip to balance the warm, cheesy flavors. Sour cream, guacamole, a cilantro-lime ranch, or a smooth queso dip are all fantastic choices.
Is it possible to make a smaller version?
Yes! Simply halve all the ingredients and build a smaller, two-layer ring using about 8-10 tortilla cones per layer. Keep the baking time the same and watch for that golden, bubbly finish.
Recipe Card
Prep Time: 25 minutes
Cook Time: 20 minutes
Total Time: 45 minutes
Servings: 20 servings
Category: Appetizer, Main Course
Difficulty: Easy
Cuisine: Tex-Mex
Yield: 1 large ring
Ingredients
3 cups (375 g) cooked and shredded chicken
1 onion, chopped
1 red bell pepper, chopped
1 jalapeño, chopped
1 cup (260 g) taco sauce
20 taco-size flour tortillas
3 cups (300 g) shredded cheddar cheese
3 cups (300 g) shredded Monterey Jack cheese
Instructions
Preheat oven to 375˚F (190˚C). Line a baking sheet with parchment paper.
In a large bowl, combine the shredded chicken, onion, bell pepper, jalapeño, and taco sauce. Mix until evenly coated.
Cut each tortilla in half. On each half, evenly layer about 2 tablespoons total of the cheddar cheese, Monterey Jack cheese, and the chicken mixture.
Starting from the cut edge, roll each tortilla half tightly into a cone shape.
Place a wide-mouth jar or glass in the center of the prepared baking sheet. Arrange approximately 13 tortilla cones around the jar, points facing inward, to form the base layer.
Sprinkle a handful of the mixed cheeses over the first layer. Repeat with a second and third layer of cones, finishing with the remaining cheese.
Carefully remove the jar from the center of the ring.
Bake for 15-20 minutes, or until the cheese is melted and bubbly and the tortilla edges are golden brown and crispy.
Transfer the ring to a serving platter. Fill the center with your desired dip and serve immediately.
Notes
Nutrition information is an estimate and will vary based on specific ingredients and brands used.