The Easiest Baked Pimento Cheese Dip Recipe (Made in a Foil Tray!)
There’s a certain magic that happens when humble ingredients are transformed by heat into something utterly irresistible. For me, that magic is embodied in this Baked Pimento Cheese Dip. It’s more than just an appetizer; it’s a portal to my childhood summers in the South, where the air was thick with humidity and the sound of screen doors slamming. My grandmother would whip up a version of this for any and every gathering, and the sight of that bubbling, golden-topped cheese coming out of the oven was a promise of good times and great conversation. This particular recipe, with its clever use of a simple tin foil tray, is my modern homage to those memories—minimal cleanup, maximum flavor, and all the creamy, tangy, comforting joy you could want.
Why You’ll Love This
Effortless Elegance: It looks and tastes like you spent hours in the kitchen, but the simple foil tray method makes preparation and cleanup a breeze.
The Ultimate Comfort Food: The combination of warm, melted cheese with a subtle kick is pure, unadulterated comfort in every scoop.
A Certified Crowd-Pleaser: This is the dish that disappears first from the snack table, guaranteed to earn you recipe requests.
Unbeatable Versatility: Serve it with crackers, veggies, or bread—it’s the perfect anchor for any snack spread.
I’ll never forget the time I brought this dip to a friend’s potluck. Her father, a man known for his stoic demeanor and general disinterest in what he called “fancy snacks,” hovered near the table. After a tentative first bite on a plain water cracker, he helped himself to a second, then a third. Soon, he was stationed right next to the tray, quietly informing newcomers, “You’ve got to try this one before it’s gone.” Winning over the toughest critic with something so simple? That’s the power of this dip.
What Makes It Special
Cream Cheese & Sharp Cheddar: The dream team. Cream cheese provides an ultra-creamy, lush base, while freshly grated sharp cheddar delivers a bold, tangy punch that pre-shredded cheese can’t match.
Diced Pimentos: These aren’t just for color! They offer a sweet, slightly tangy flavor and a tender texture that cuts through the richness of the cheese.
A Hint of Heat: A dash of hot sauce and a sprinkle of garlic powder add layers of warmth and savoriness that make the dip incredibly moreish.
The Tin Foil Tray: This is the secret weapon. It promotes even heating, creates those coveted crispy, golden edges, and makes cleanup as simple as tossing the tray.
Making It Happen
Start by preheating your oven to 375°F (190°C). There’s no need to grease your trusty tin foil tray—this dish has enough fat to prevent sticking. In a large mixing bowl, combine the softened cream cheese, mayonnaise, and Worcestershire sauce. Use a hand mixer or a sturdy spatula to beat this together until it’s smooth and well-combined.
Now, fold in your star players: the freshly grated sharp cheddar cheese, the drained diced pimentos, a generous pinch of garlic powder, and a few dashes of your favorite hot sauce. Mix everything until the cheese and pimentos are evenly distributed throughout the creamy base. The mixture will be thick and chunky, which is exactly what you want.
Transfer this cheesy masterpiece into your foil tray and spread it into an even layer. Pop it into the preheated oven and bake for 20-25 minutes. You’re waiting for that magical moment when the edges are bubbling fervently and the top is kissed with golden-brown spots. Once it’s there, carefully remove it from the oven. Let it rest for just 5 minutes—this allows the molten cheese to settle slightly, making it the perfect dipping consistency.
You Must Know
Grate Your Own Cheese: Pre-shredded cheese is coated in anti-caking agents that can make your dip grainy and prevent it from melting smoothly. Taking a minute to grate a block of cheddar is the single biggest upgrade you can make.
Don’t Skip the Softening: Ensure your cream cheese is at room temperature. If it’s too cold, it will be impossible to blend smoothly, leaving you with lumpy dip.
Embrace the Browning: Don’t be afraid of those dark, caramelized spots on top after baking. They add a incredible depth of flavor and a slightly crispy texture.
Let it Rest: That five-minute rest after baking is crucial. It allows the dip to thicken up just enough to be scoopable, rather than a runny lava flow.
Serving It Up
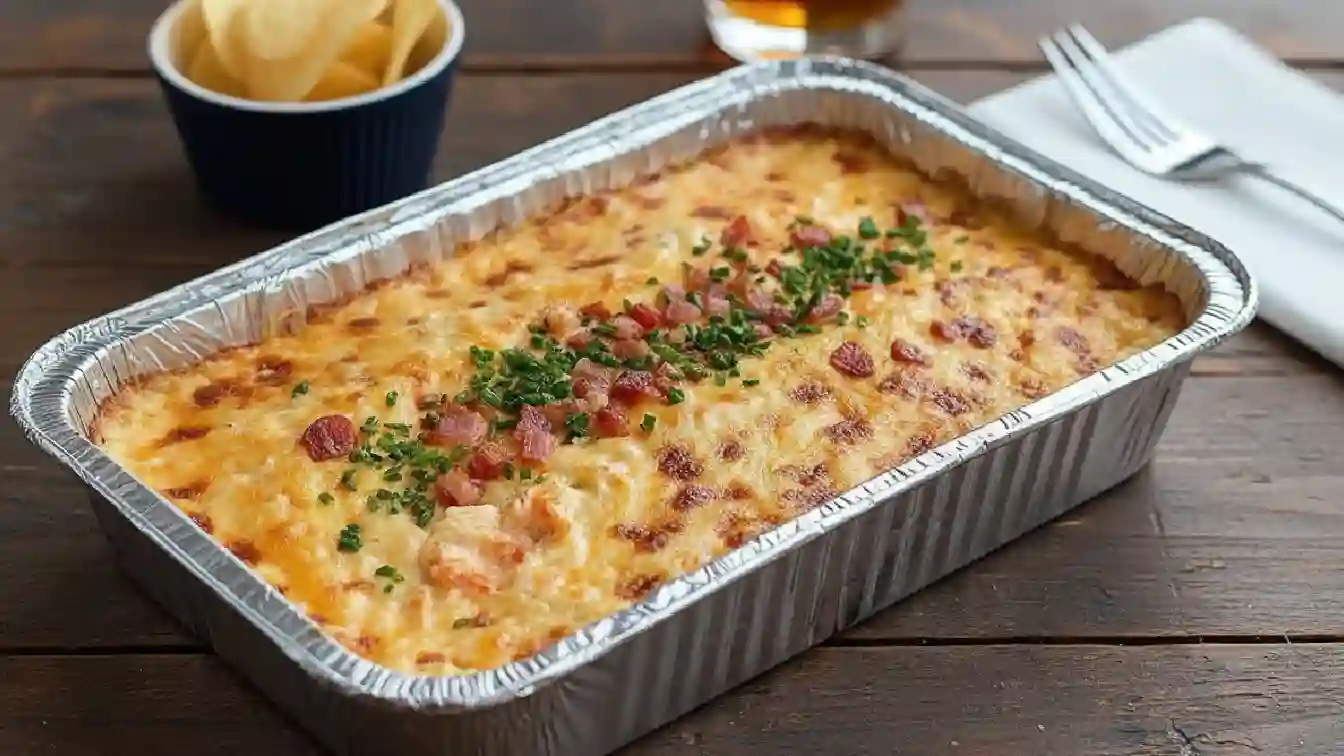
This dip is the life of the party. Serve it straight from the foil tray for a rustic, communal feel. Surround it with an array of dippers: sturdy potato chips, crispy baguette slices, crunchy celery sticks, or sweet bell pepper strips. For a drink pairing, a cold, crisp lager or a zesty pale ale cuts through the richness beautifully. For a non-alcoholic option, an iced sweet tea is a classic Southern companion.
Make It Different
Spicy Kick: Add a finely diced jalapeño (seeds removed for less heat) or a teaspoon of cayenne pepper to the mix.
Smoky Twist: Substitute smoked paprika for the garlic powder and use a smoked cheddar cheese for a deep, woodsy flavor.
Bacon Lover’s Dream: Fold in half a cup of cooked, crumbled bacon before baking. Top with the remaining bacon after it comes out of the oven.
Lightened-Up: Use light cream cheese and light mayonnaise. The flavor will still be fantastic.
Storing and Reheating Your Dip
Store any leftover dip (a rarity!) in an airtight container in the refrigerator for up to 3 days. To reheat, the oven is your best friend for restoring that creamy texture. Place the dip in an oven-safe dish (or a new foil tray) and warm at 350°F (175°C) for 10-15 minutes, until heated through. You can also reheat small portions in the microwave in 30-second bursts, stirring between each, though this may make the texture a bit oilier.
Success Tips
For an extra-toasty top, you can pop the dip under the broiler for the last minute of cooking. Watch it closely to prevent burning!
If your dip seems too thick after mixing, you can add a tablespoon of milk to loosen it up slightly before baking.
Taste the mixture before you bake it! Adjust the seasoning to your preference—maybe you want more hot sauce or a pinch of black pepper.
Frequently Asked Questions (FAQ)
Can I make this dip ahead of time?
Absolutely. You can assemble the dip in the foil tray, cover it tightly with plastic wrap, and refrigerate it for up to 24 hours before baking. You may need to add 2-3 extra minutes to the baking time since it will be going into the oven cold.
What can I use instead of a tin foil tray?
Any small oven-safe baking dish will work perfectly. A cast-iron skillet is an excellent choice as it gets very hot and creates wonderful crispy edges.
My dip is a little oily on top after baking. Is that normal?
Yes, this can happen, especially with certain cheeses or mayonnaise. It’s simply the fat separating. Just give it a quick stir before serving, and it will reincorporate beautifully.
Can I freeze baked pimento cheese dip?
We don’t recommend it. Cream-based dips can separate and become grainy upon thawing, losing their signature creamy texture.
What’s the best type of cheddar to use?
A block of sharp or extra-sharp cheddar will give you the most flavor. Avoid mild cheddar, as it can get a bit lost among the other ingredients.
Baked Pimento Cheese Dip In a Tin Foil Tray
Prep time: 10 minutes
Cook time: 20 minutes
Total time: 30 minutes
Servings: 6-8
Category: Appetizer
Difficulty: Easy
Cuisine: American
Yield: 1 foil tray
Ingredients
8 ounces cream cheese, softened to room temperature
1/2 cup mayonnaise
1 teaspoon Worcestershire sauce
1/4 teaspoon garlic powder
1/2 teaspoon hot sauce (like Tabasco), or to taste
2 cups sharp cheddar cheese, freshly grated
1 (4-ounce) jar diced pimentos, drained
Salt and black pepper to taste
Instructions
Preheat your oven to 375°F (190°C).
In a medium-sized mixing bowl, combine the softened cream cheese, mayonnaise, Worcestershire sauce, garlic powder, and hot sauce. Beat with a hand mixer or mix vigorously with a spatula until smooth and well-combined.
Add the grated cheddar cheese and drained pimentos to the bowl. Fold gently until everything is evenly incorporated.
Transfer the mixture to a standard 8-inch tin foil tray and spread it into an even layer.
Bake for 20-25 minutes, or until the dip is hot, bubbly around the edges, and has golden-brown spots on top.
Remove from the oven and let it cool for 5 minutes before serving.
Notes
For the best texture, always grate your own cheese from a block. Letting the dip rest for 5 minutes after baking allows it to set slightly for the perfect dipping consistency.
Nutrition Information
(Per serving, based on 8 servings)
Calories: ~280 | Fat: 26g | Saturated Fat: 11g | Cholesterol: 55mg | Sodium: 350mg | Carbohydrates: 3g | Fiber: 0g | Sugar: 1g | Protein: 9g